

| WPL Printer Driver: | Printer driver for most Wasp WPL printers |
| DiagTool: | WPL Printer Diagnostic Tool (DiagTool) |
| Printer Configuration utility: | Printer Configuration utility |
| Manuals: | |
| WPL308: Wifi module installation | WPL308: Wifi module installation |
| Configure Wifi on WPL printer | Configure Wifi on WPL printer |
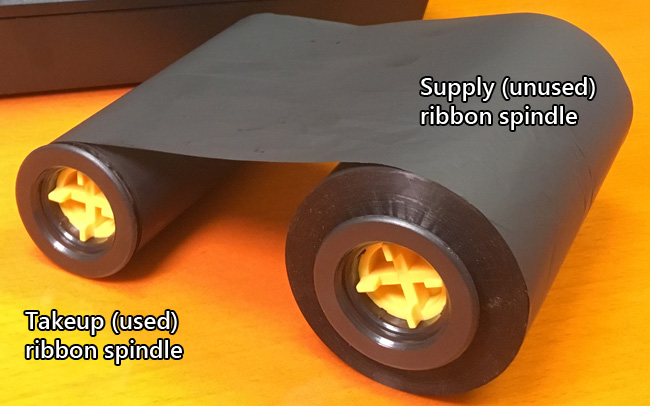
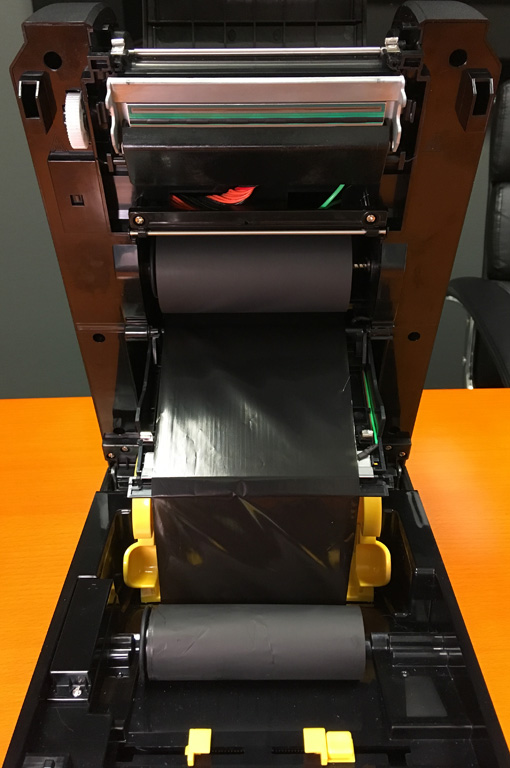
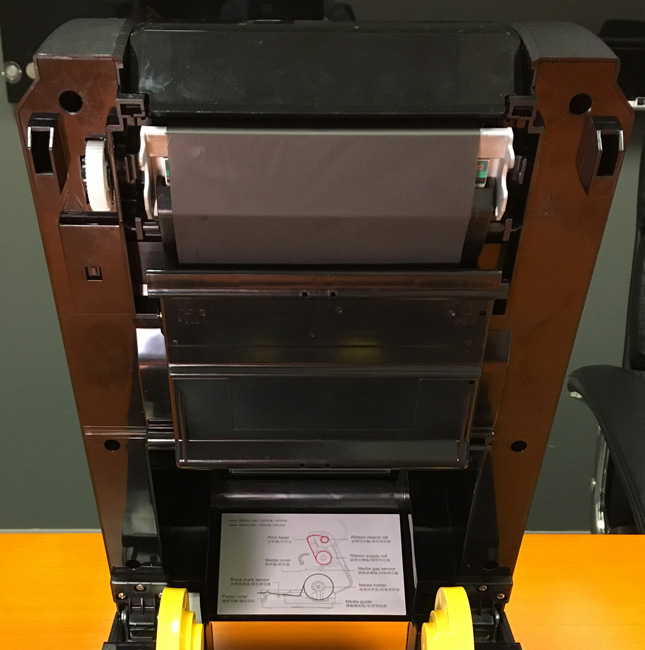
How to load the ink ribbon and media/labels:
1. If necessary, tape down the end of the ribbon to the empty cardboard core. If a ribbon has been cut or broken during use, also tape it down as shown.
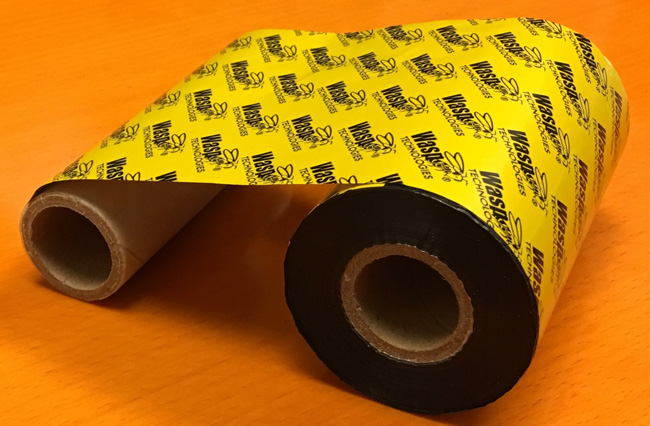
2. Insert the ribbon spindles into the cardboard cores as shown.
3. Open the top curved lid piece upward, and the interior media cover downward.
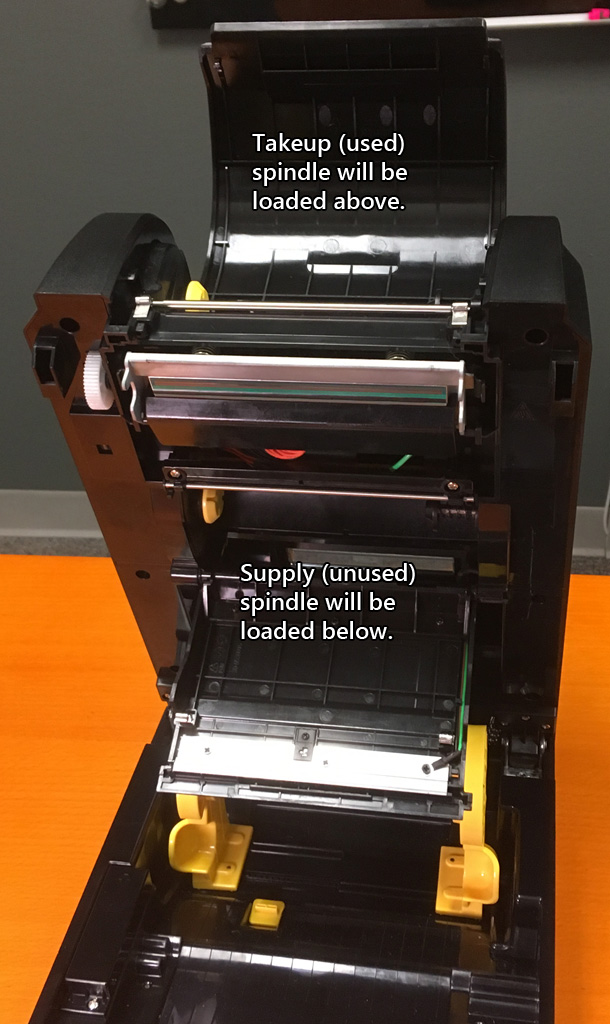
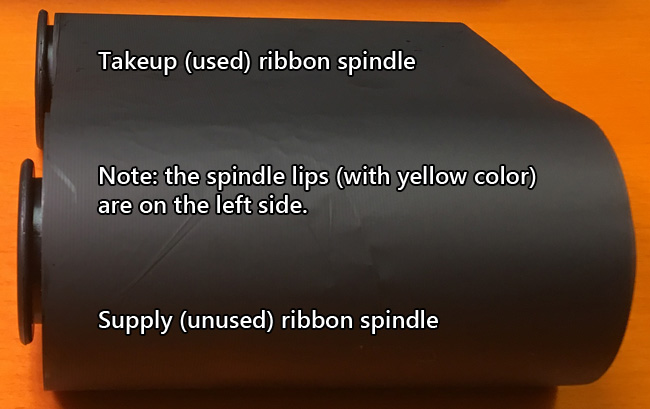
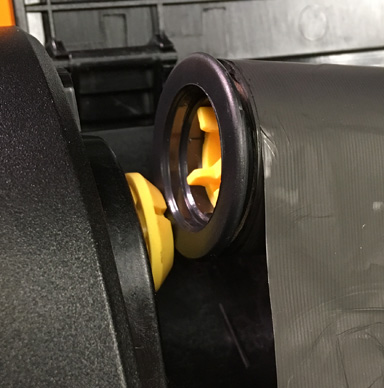
4. Leaving the takeup (used) spindle below, pull the supply (unused) spindle up, then slide it in and to the right, engaging the right/black side of the spindle to the black spring-loaded hub. Then slide the left/yellow side onto the yellow hub. The yellow tabs should engage the yellow slots.
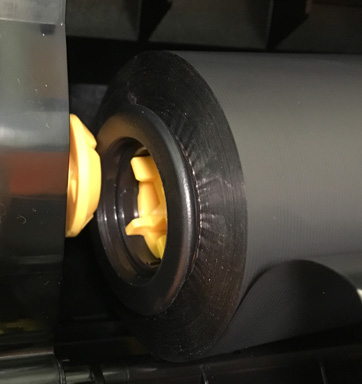
5. Pull the takeup spindle up and mount it the same way: First the right/black side, then the left/yellow side.
6. Roll the left side of the takeup spindle forward/counter-clockwise to tighten the ribbon.
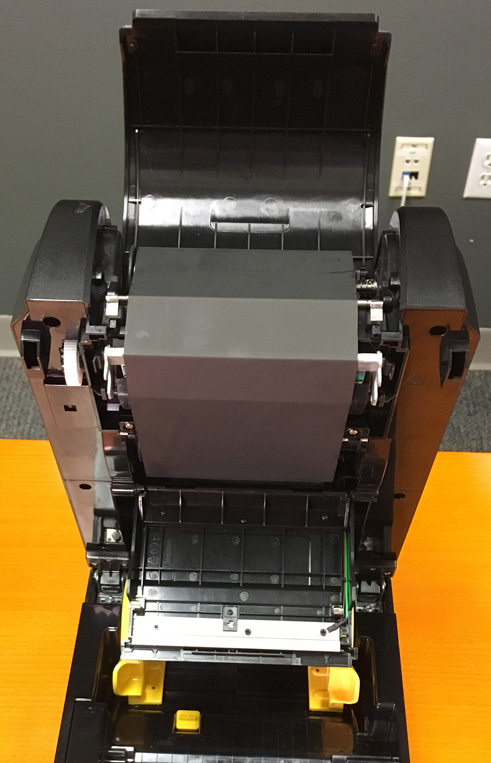
7. Close the lid and media cover.
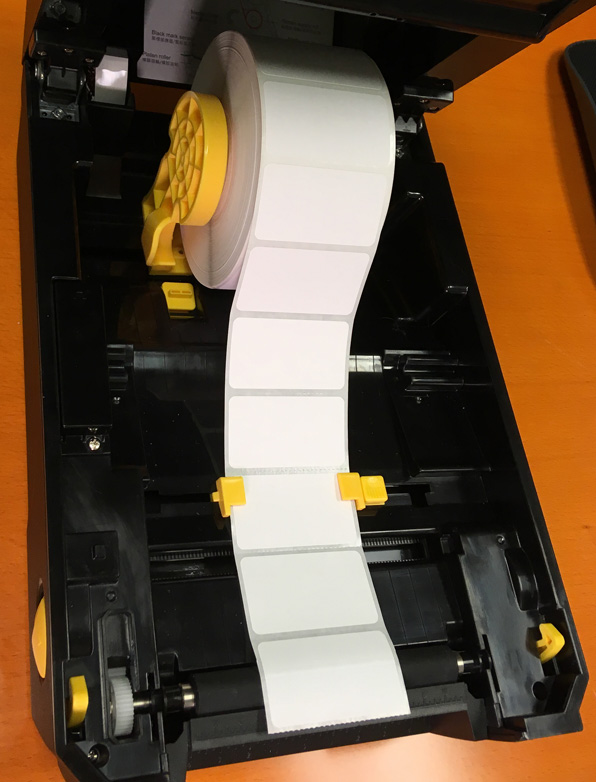
8. Load the media/labels. In the back are the spring-loaded media holders for the label roll. If necessary, pull the yellow tab at the left side rear printer floor to release the media holders. Then spread the holders apart so the labels can be inserted. Then the holders will spring back together. If desired, snap the yellow tab forward to lock the holders in place. Move the media guides to fit the label width by pushing the media guide adjustment button, then sliding the linked guides. Pull some labels forward and lay them flat across the black rubber platen roller at the front.
9. Close the print head housing, latching both sides gently but firmly.
The ribbon and labels are now loaded.
Additional Information:
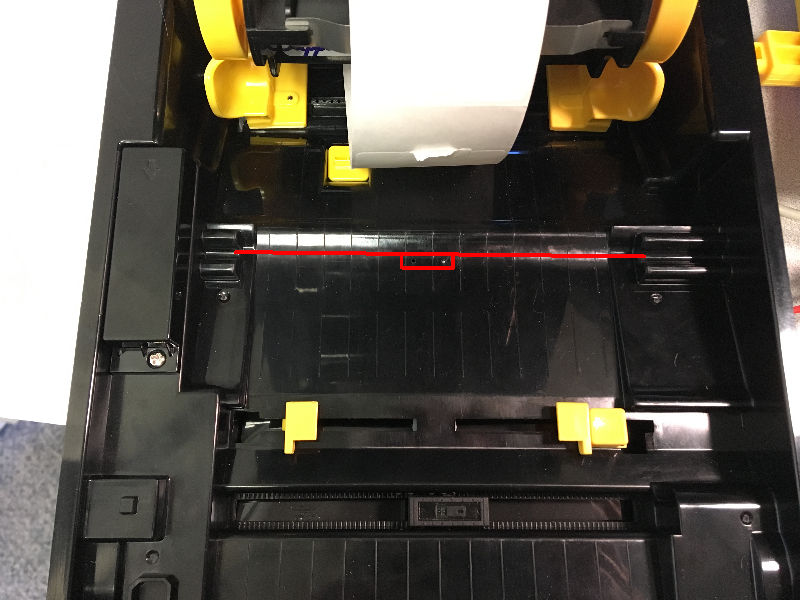
The picture below shows the location of the label sensor (red box). The two small holes of the sensor are approximately in line with the grooves on either side. This aids in positioning the liner and label when performing the manual calibration process.
Firmware A2.11 fixes a label calibration issue
https://dl.waspbarcode.com/kb/printer/wpl308/WPL308_VA2.11_EZD.NEW