How to Configure Wifi on a WPL printer
This article applies to WPL308, WPL308 Plus, WPL614, WPL614 Plus, WPL618 and other printers with an installed Wi-Fi interface card.
Connect the printer to a PC. The easiest way is directly via USB cable, though it is possible over (wired) ethernet.
Run the Printer Configuration Tool. If needed, here's the download link:
https://dl.waspbarcode.com/kb/printer/PrinterConfig-x64.exe

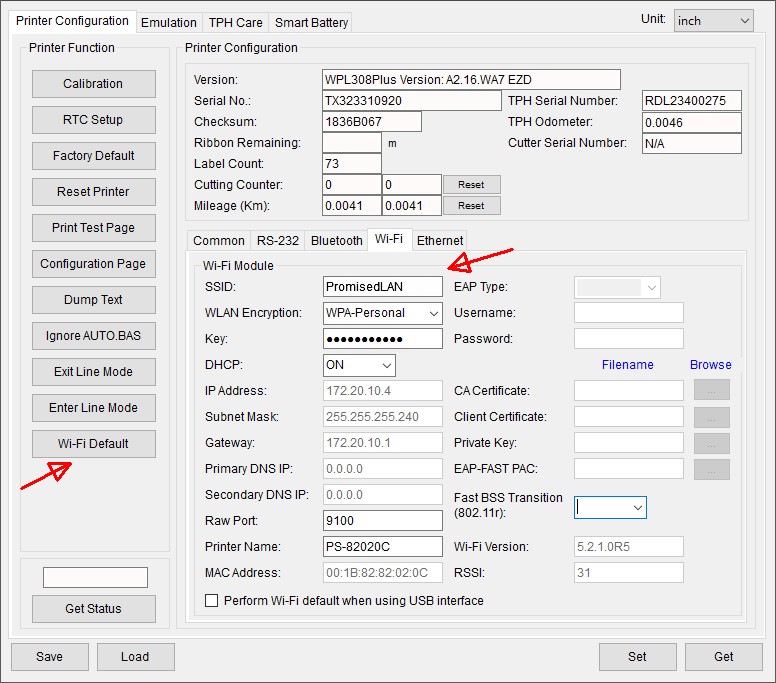
Find your printer in the list and double-click it. The default Printer Configuration main tab appears.
Click the Wi-Fi secondary tab (near the middle of the window). (see red arrow in screenshot)

Fill in SSID. This is your wifi network name.
Set the Encryption type required by your network. This is often WPA-Personal, but may be different.
Set the Key, which is your wifi password.
Set DHCP to ON.
NOTE: Some networks have different settings & requirements from the above settings. Wasp does not know your settings, so consult your network admin for guidance.
When the settings are filled in, click the Set button toward the lower right. There will be a Please Wait message with a countdown timer.
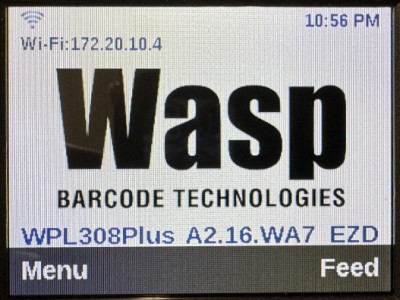
When the countdown is complete, the printer will reset itself. After a few moments, the Wi-Fi antenna icon and IP address should show on the printer's display.

In the Printer Configuration tool, you can click the Get button (lower right) to retrieve new Wi-Fi settings from the printer into the dialog box.
If the printer has trouble obtaining an IP address from your network, try the Wi-Fi Default button at the left side of the Printer Configuration main (see red arrow in screenshot above), then re-enter wi-fi info as needed.

