| WPL305 Driver: | Printer driver for most Wasp WPL printers |
| DiagTool: | WPL Printer Diagnostic Tool (DiagTool) |
| Manuals: |
Images:
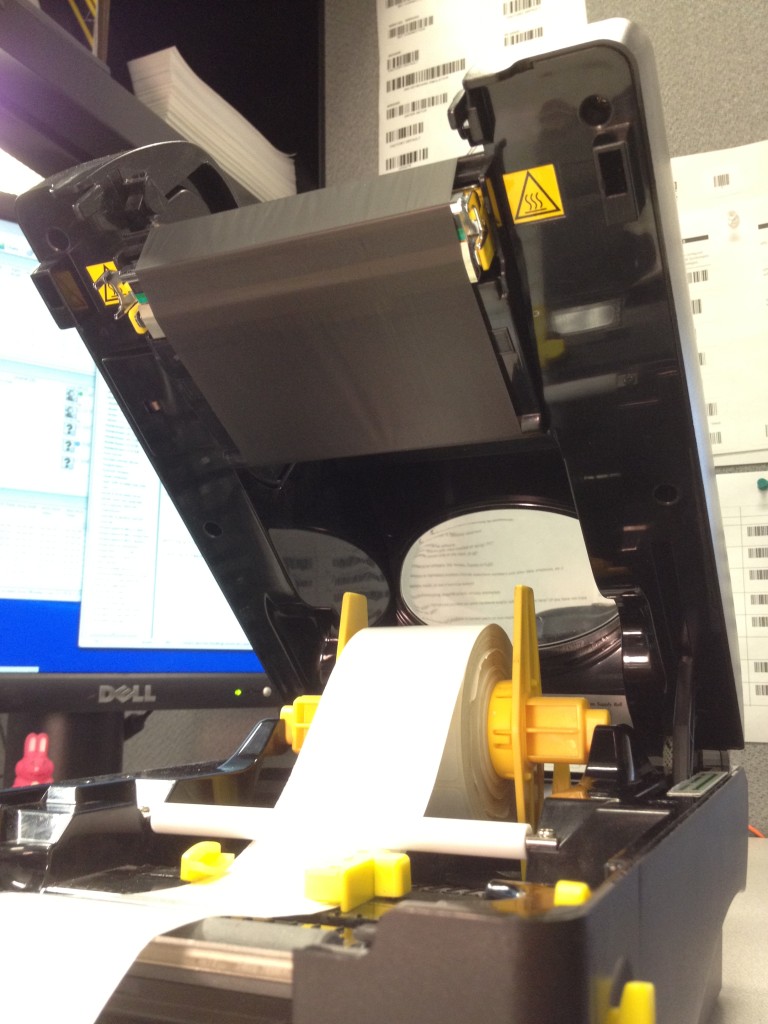
Load the ribbon (also see other images further down).
1. Drop the empty takeup core down the back.
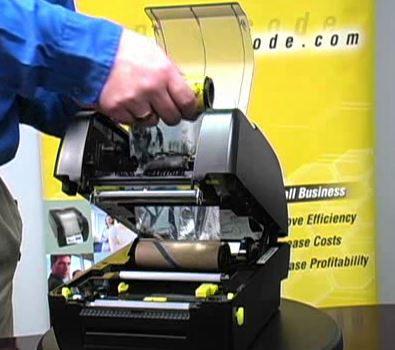
2. Load the unused roll in back.
3. Pull the takeup core forward and up, then load it in front.
Load the labels centered on the yellow supply spindle, and place the wing guides on either side. Tighten the yellow label sensor/guides so they are snug but do not bind the label stock.
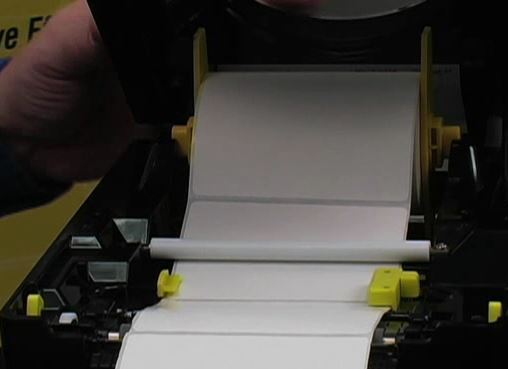
Another view of properly loaded labels and label sensor/guides. The labels lay flat across the top the gray platen roller and metal tear-off bar. The label sensor (yellow guides toward the front) should be snug to the label strip (but not binding).
Note the positioning of the right side of the label sensor over the label. When using gap labels (the most common type), if this sensor is too far away from the label, the sensor component will not be able to see the gaps between labels, and the DiagTool will report the Media Sensor as Continuous instead of the correct GAP value when auto-calibrating, and the printer will eject many labels during the calibration process.
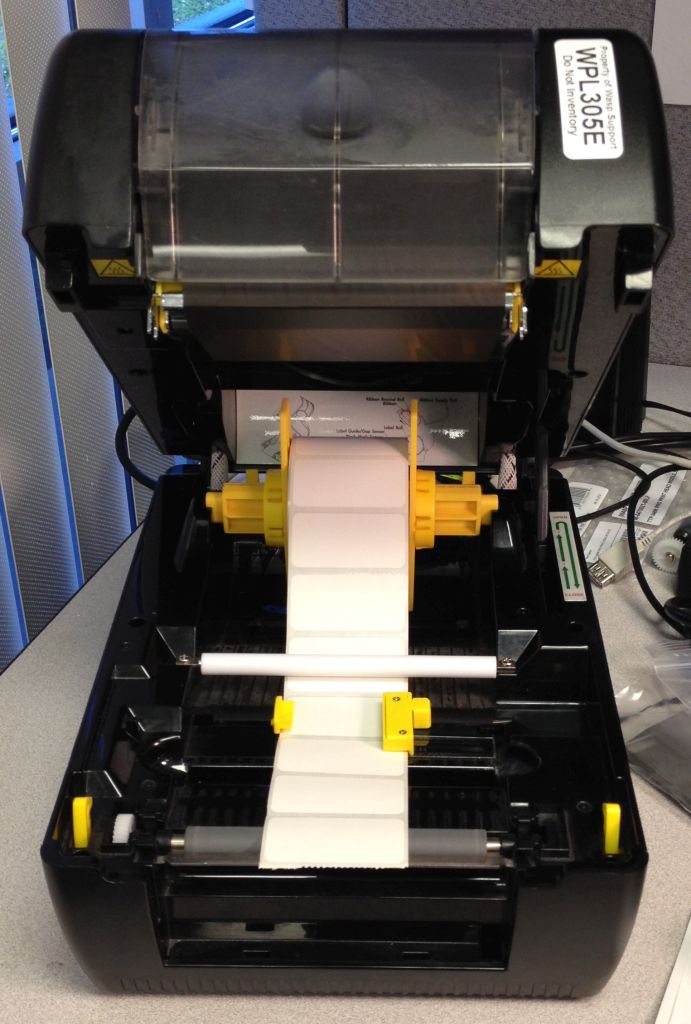
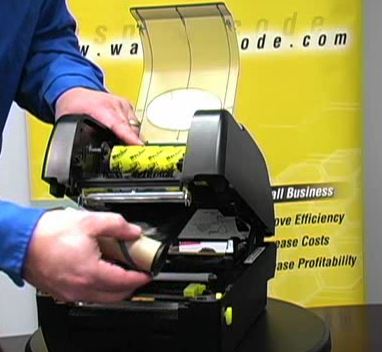
Loading the ribbon (front view). The black spindles should be inserted through the cardboard cores from the right, so the spindle lip is on the right. Drop the used/takeup spool down through the housing, then mount the unused ribbon roll at the back.

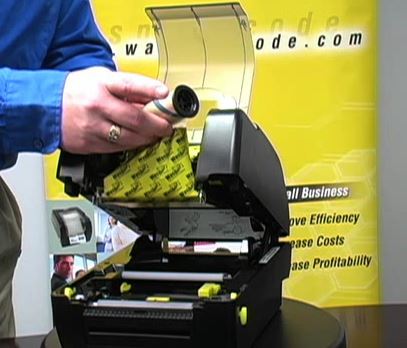
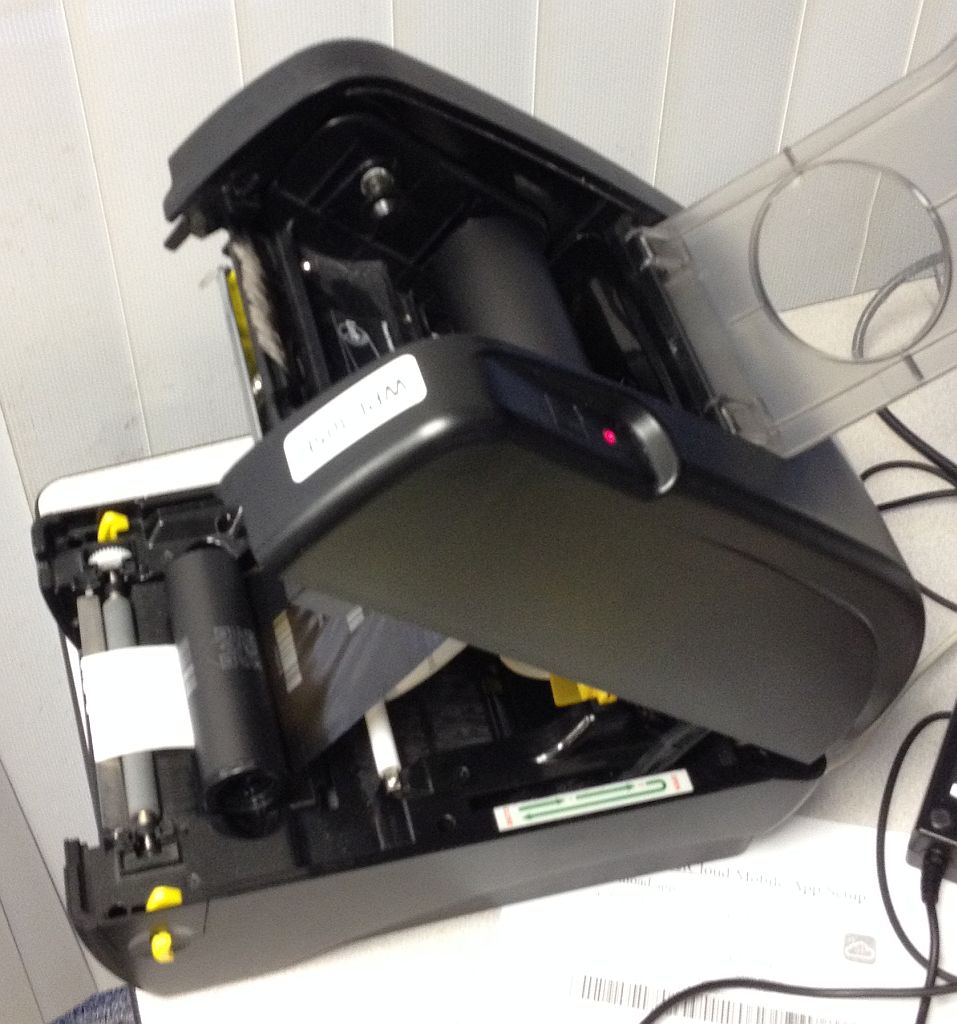
Loading the ribbon (side view). Pull the used/takeup spindle forward, then up, and mount it at the front. Wind up any slack by rotating the spindle clockwise (viewing the printer from the right).
This shows the ribbon loaded properly. The unused supply roll is in back, and the used takeup roll is in front. The dull side is what shows here; this is the ink side of the ribbon. The shiny side does not have ink on it.
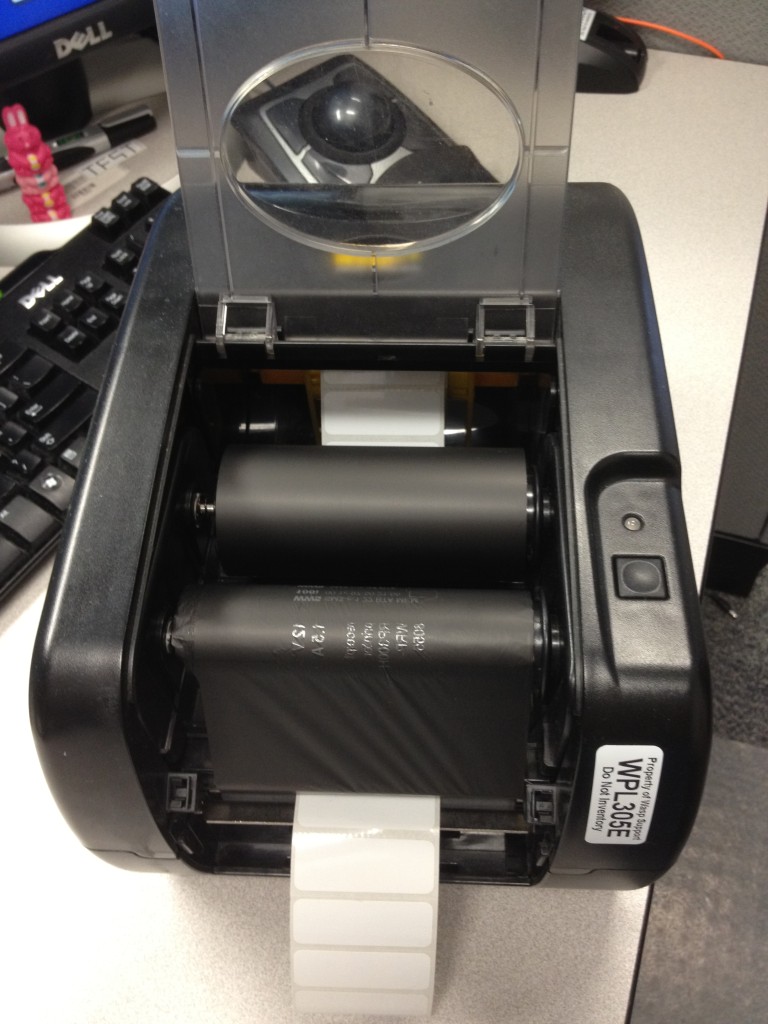
This shows the ribbon loaded properly. The ribbon comes down from the unused supply roll in back, straight across toward the front, then up the front to the used takeup roll. This is also the dull/ink side of the ribbon, which comes in contact with the labels.
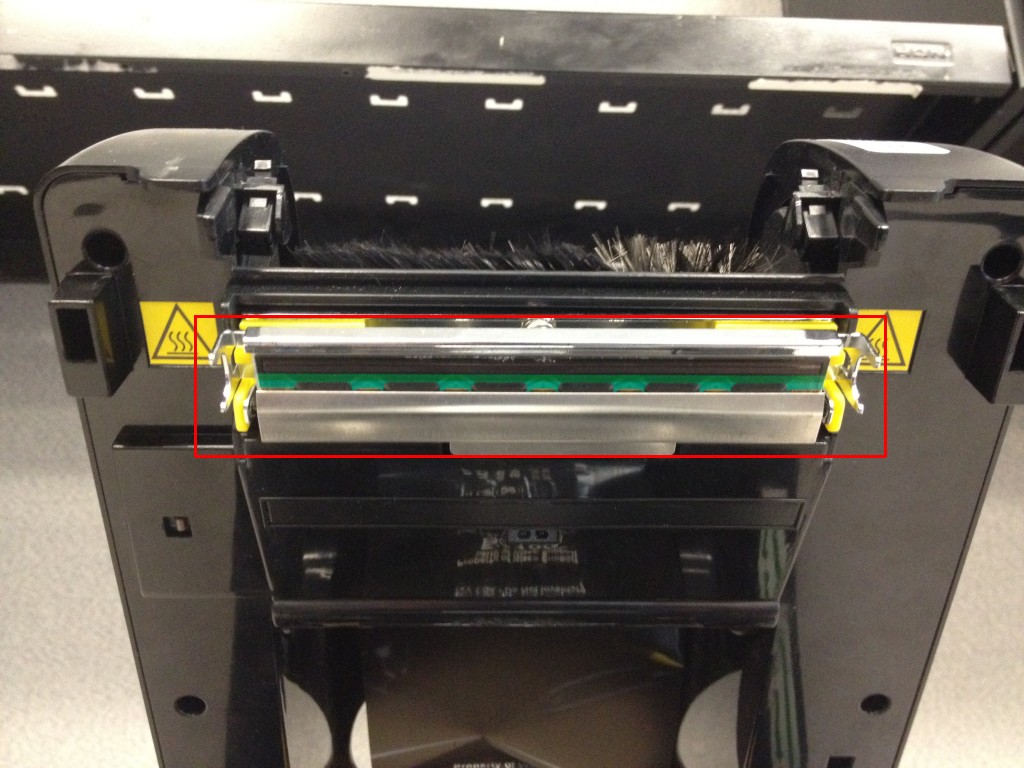
This is the print head. The dark line heats up to transfer the ink from the ribbon to the label (thermal transfer), or to darken the coated labels or tags (ribbonless, direct thermal):
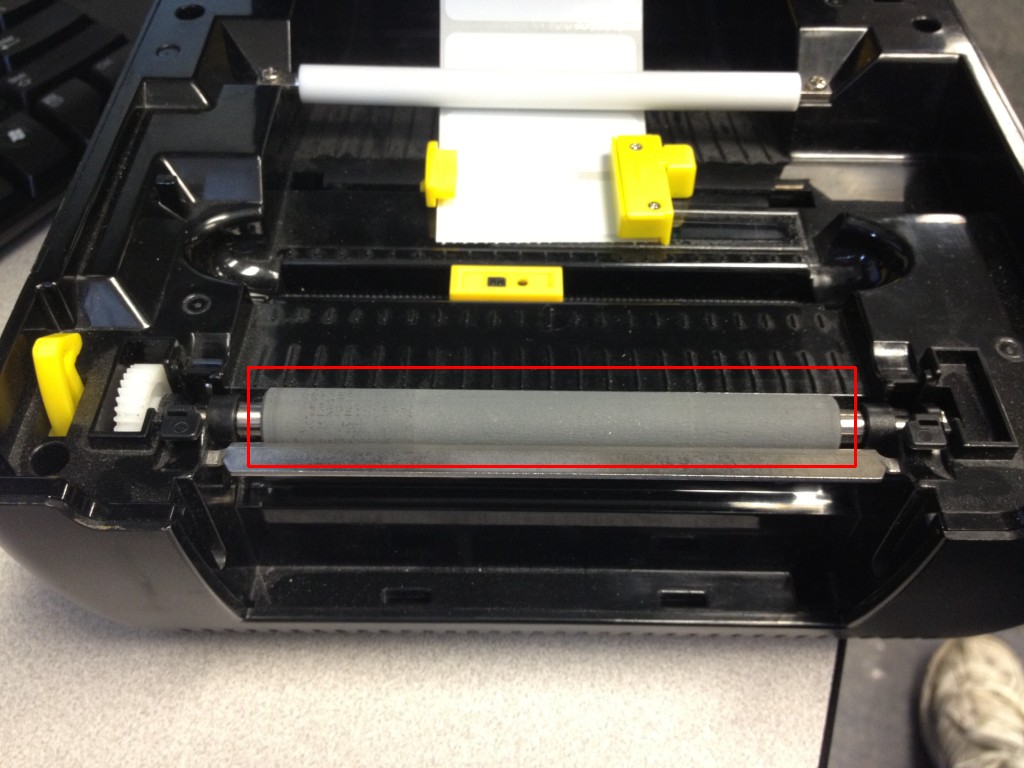
This is the platen roller:
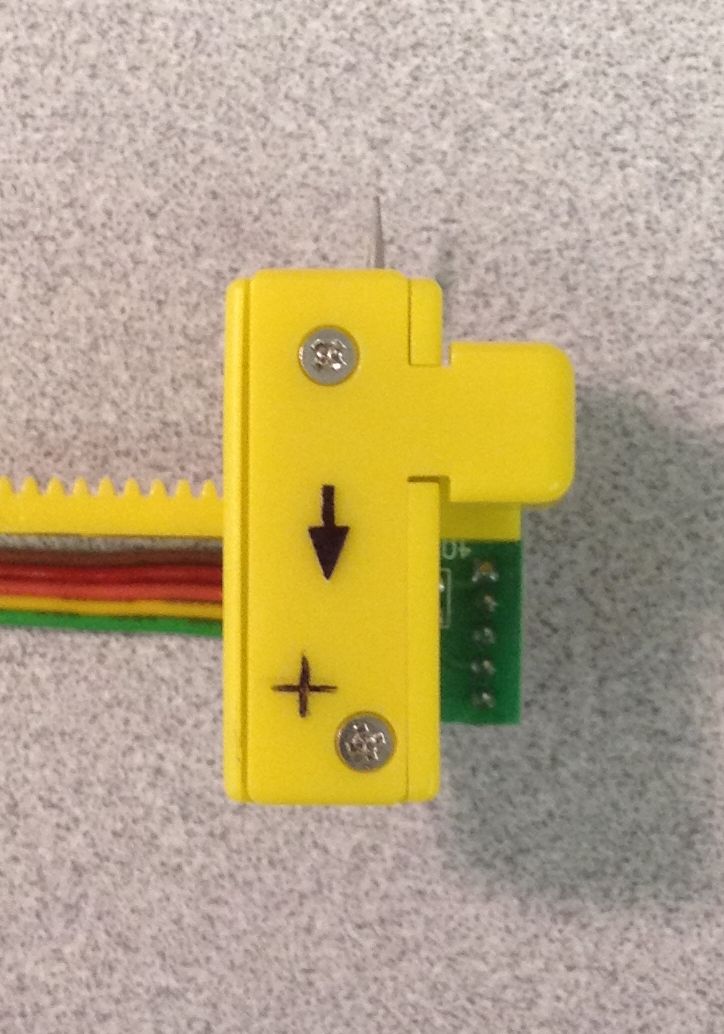
Below is the gap sensor component. The exact location of the sensor is at the + crosshatch within the yellow housing.