

This article describes how to create and restore a Wasp OnPremise (AssetCloud OnPrem or InventoryCloud OnPrem) backup with SQL Server Management Studio.
Follow these steps to move and restore the database to a new server.
Note: Install AssetCloud or InventoryCloud On Prem software on new Server prior to performing the steps below. Ensure you are able to login. If needed, see the article linked below in Related Pages: Cloud On-Premise installation: Summary & Prerequisites.
If you do not have SQL Server Management Studio installed you can download the latest version from the link below
1. Create a backup of the existing database.
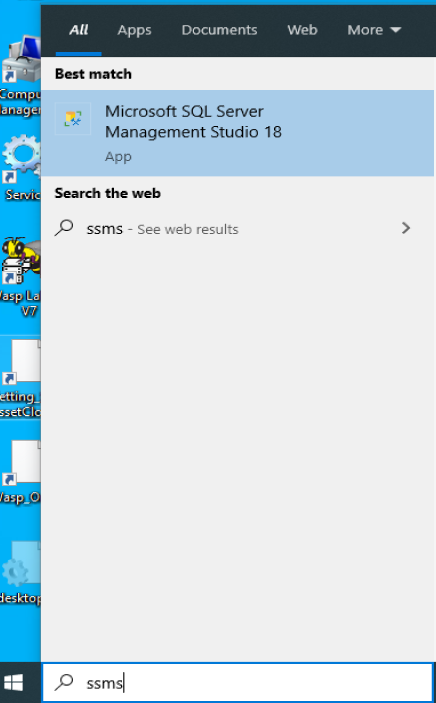
- Log into SQL. Click on the Windows Logo> Microsoft SQL Server > SQL Server Management Studio.

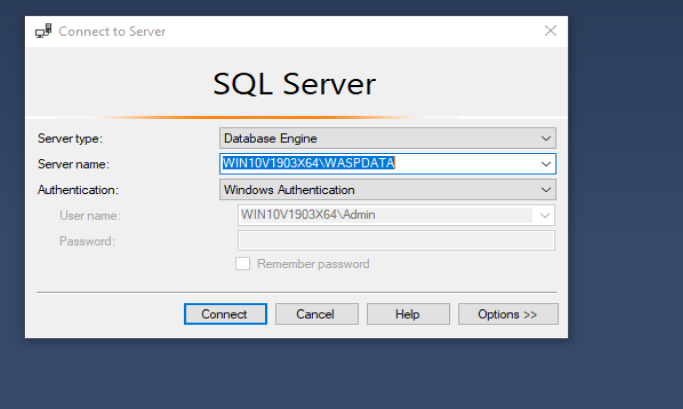
- Login using Windows Authentication

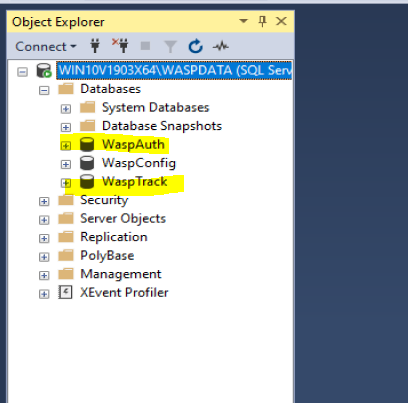
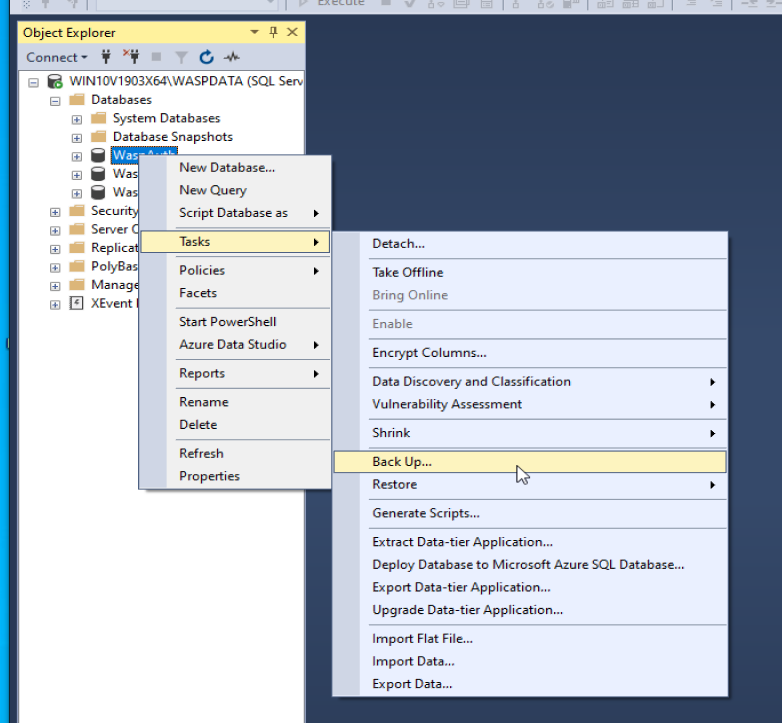
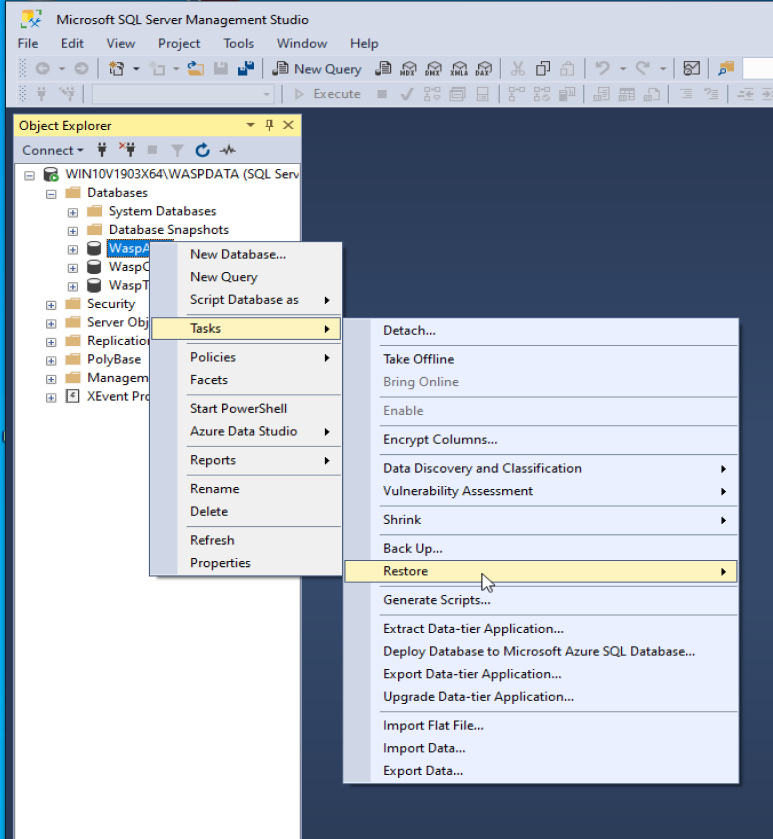
- Once in SSMS you will expand Databases. In there you will see two databases that need to be backed up, WaspAuth and WaspTrack.
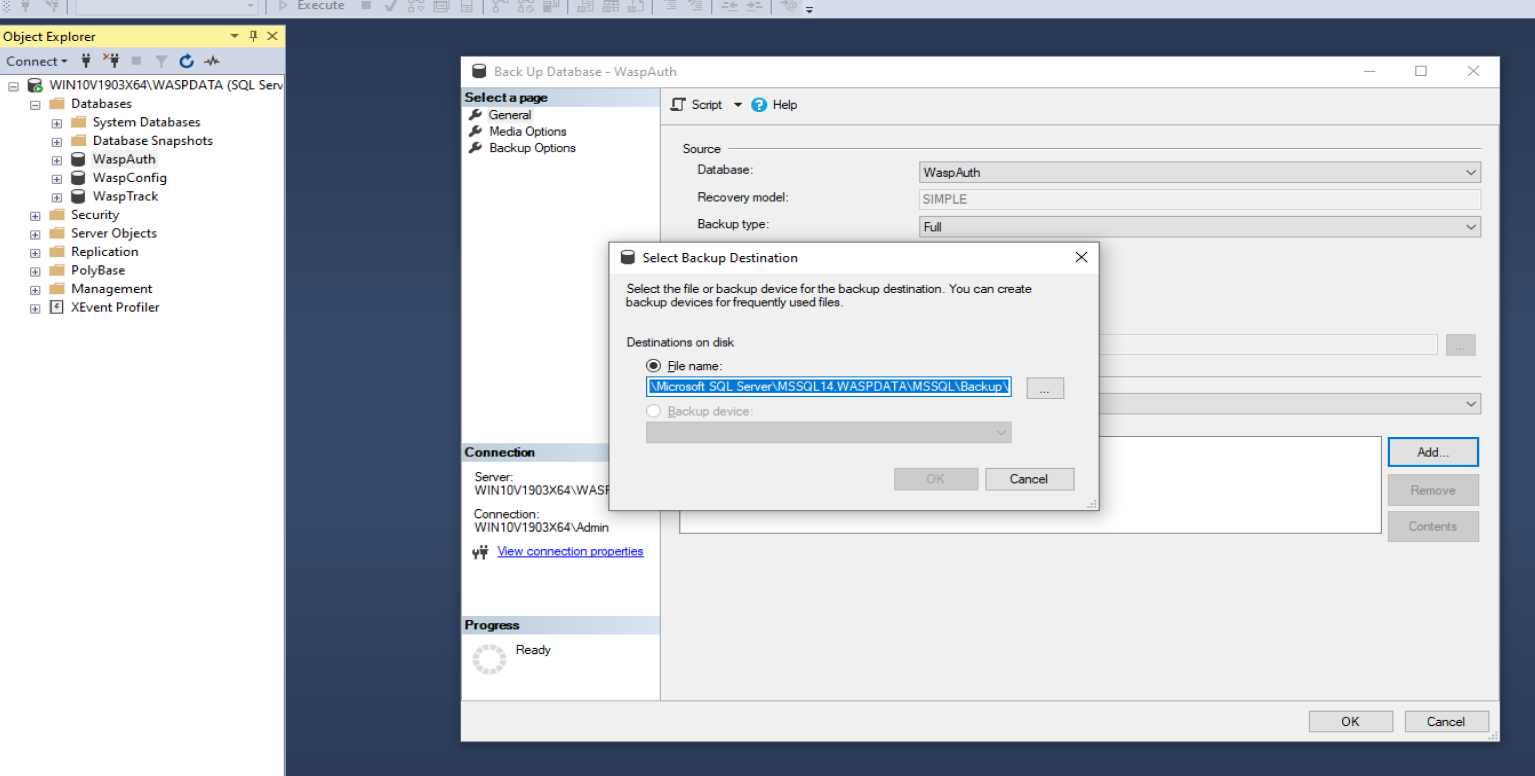
- Right-click the database you need to backup and select Tasks, then choose Back Up.
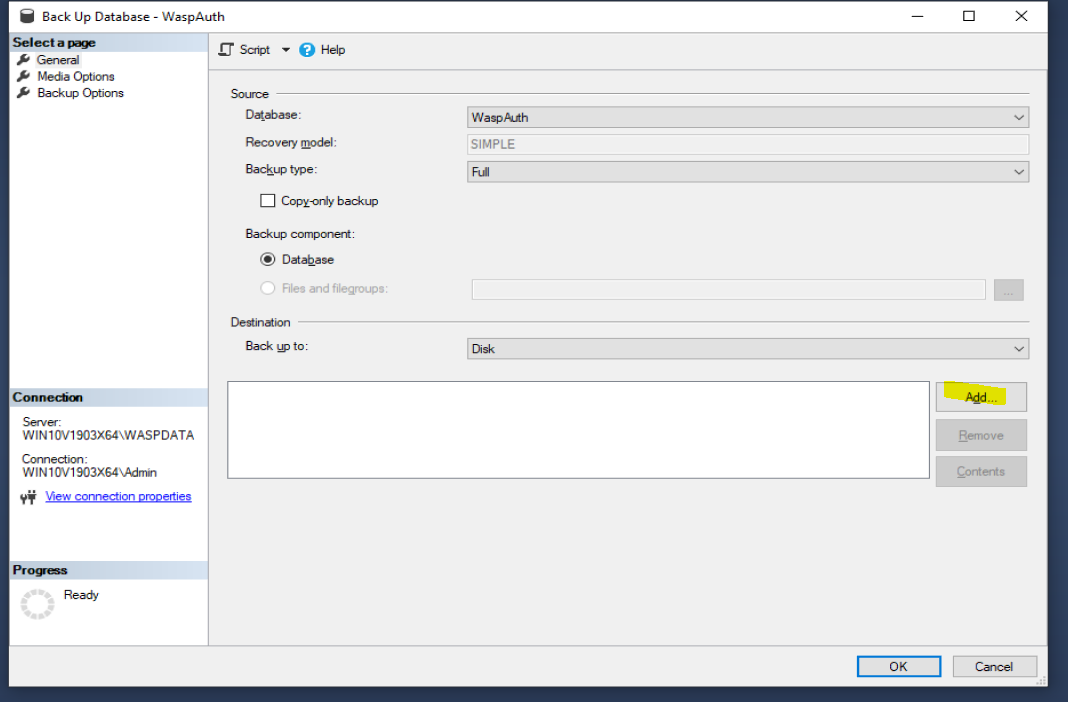
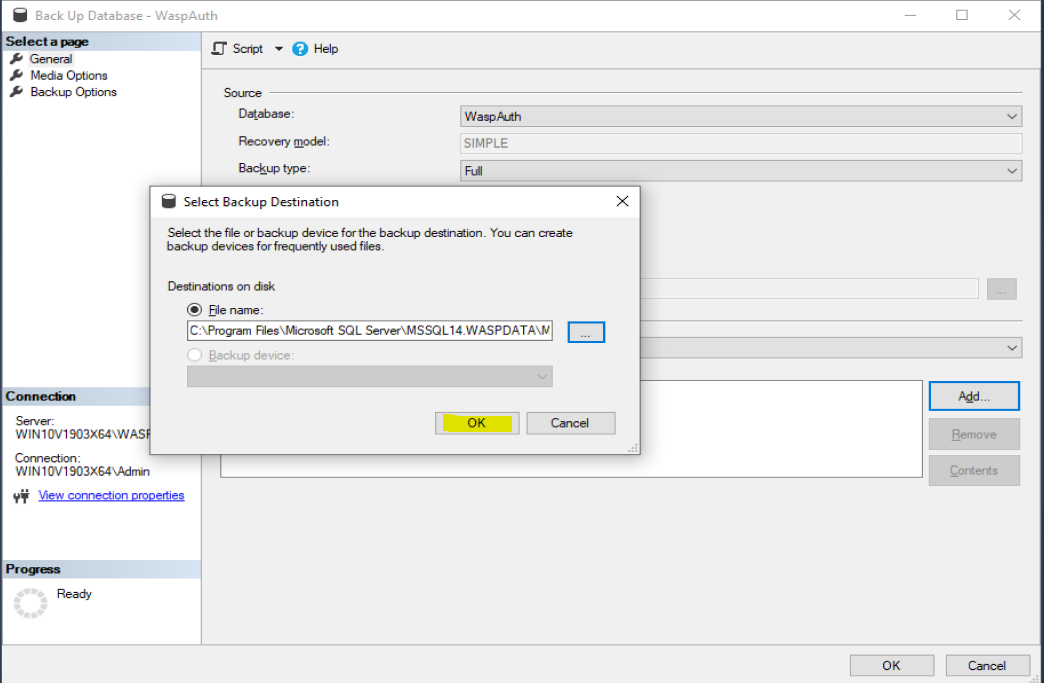
- Next to the lower Destination section of the Back Up Database - click Remove to remove anything currently shown in the box.
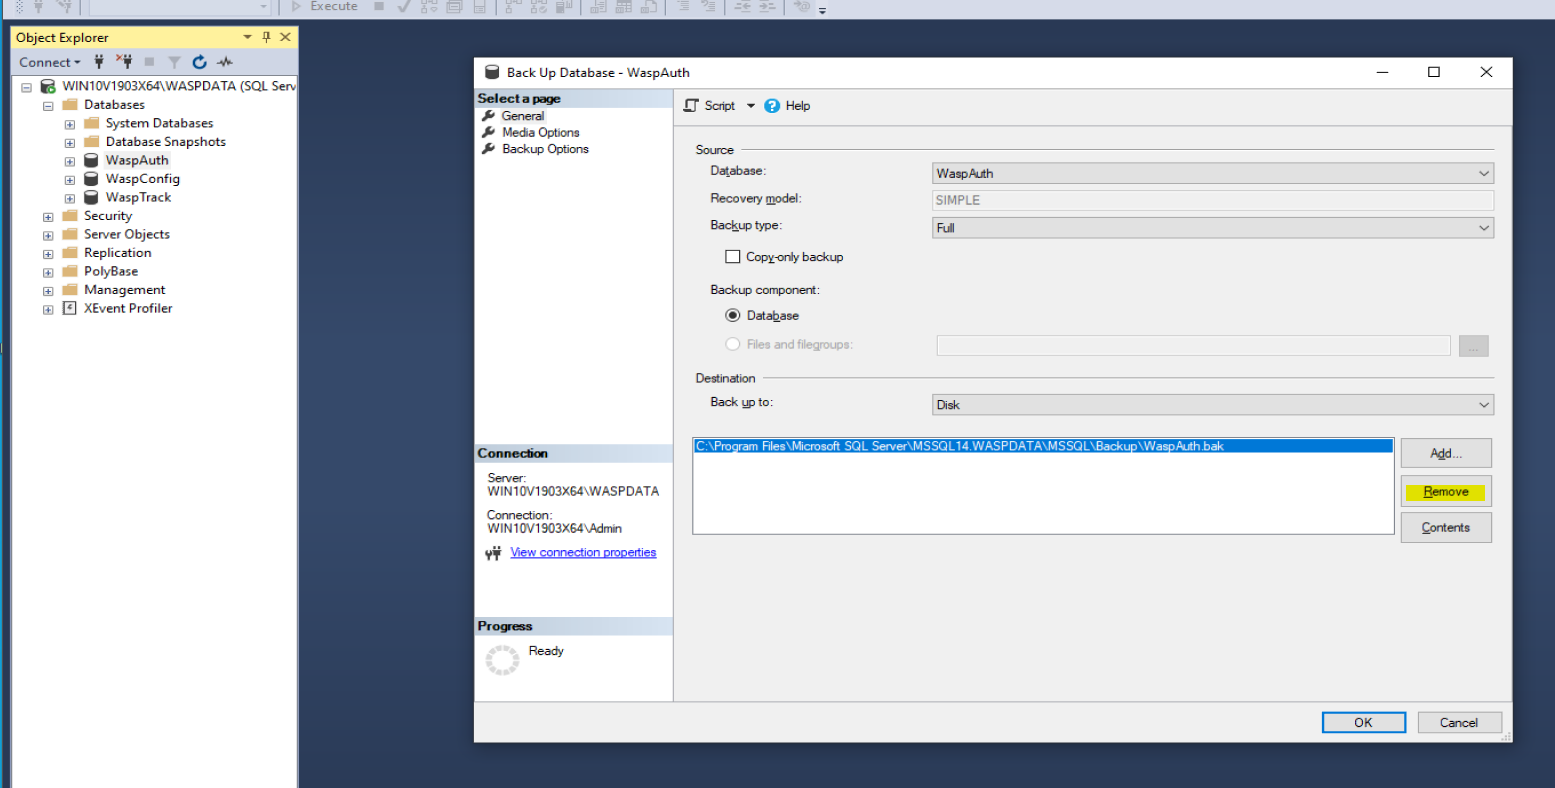
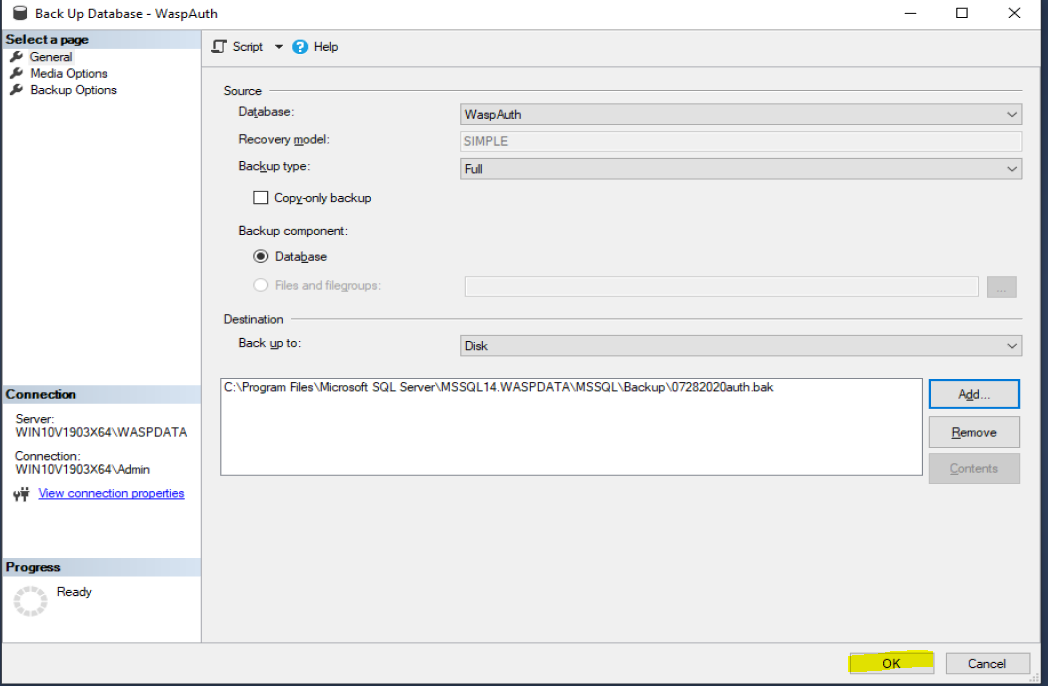
- Click Add. It will display the folder path for the installation. At the end of the path, add a filename for the backup that will be unique, like ServerMove.bak. Click OK on both windows to create the backup.
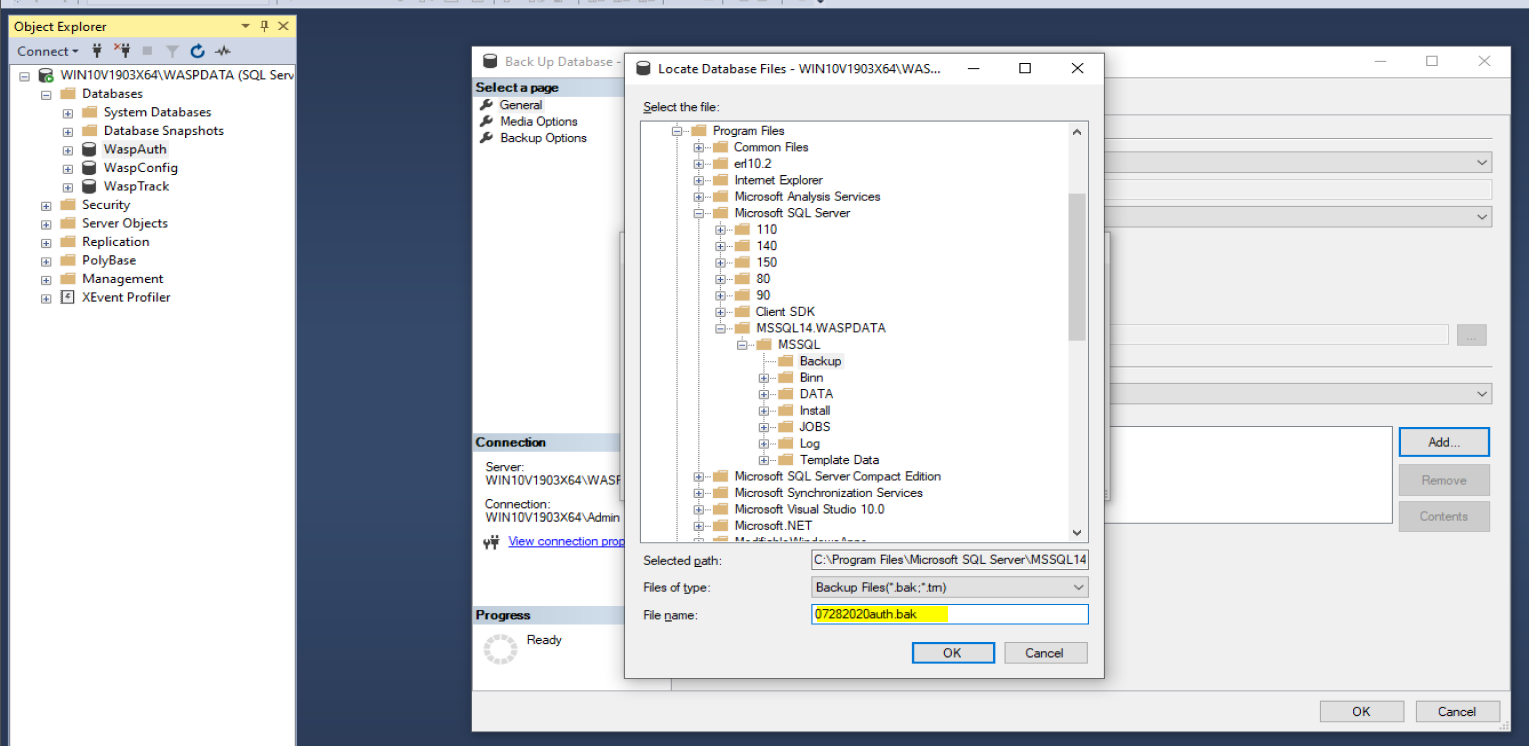

Make note of the Backup location.
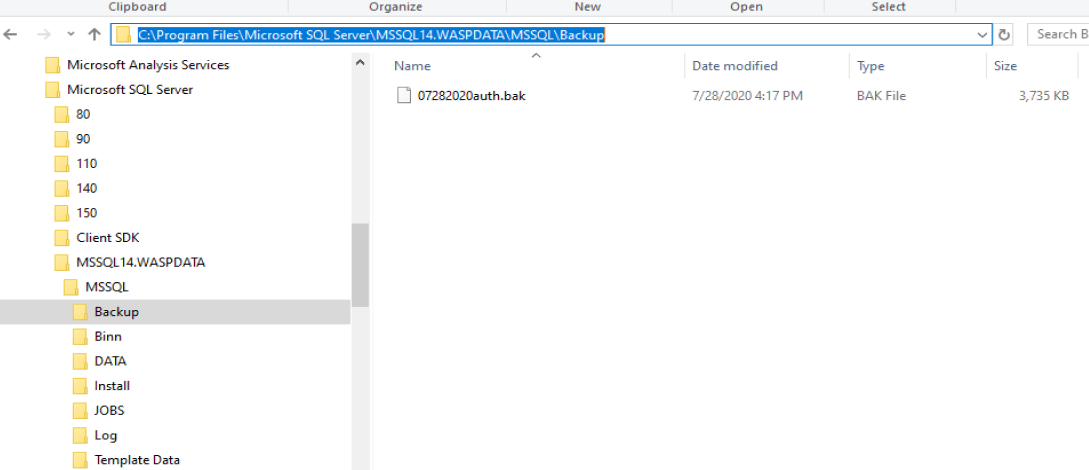
- Transfer the two files to the destination server, via flash drive, network copy, or other method to transfer the backup files to the new server. On the new server, open Windows Explorer and copy the backup files to C:\Program Files\Microsoft SQL Server\MSSQL14.WASPDATA\MSSQL\Backup.
Note: It is important to copy the files to the Backup folder to ensure they receive the correct permissions so SQL can read them.
2. Restore the backup on the new server
- Log into SQL. Click on Start > Programs > Microsoft SQL Server > SQL Server Management Studio.
- Login using Windows Authentication
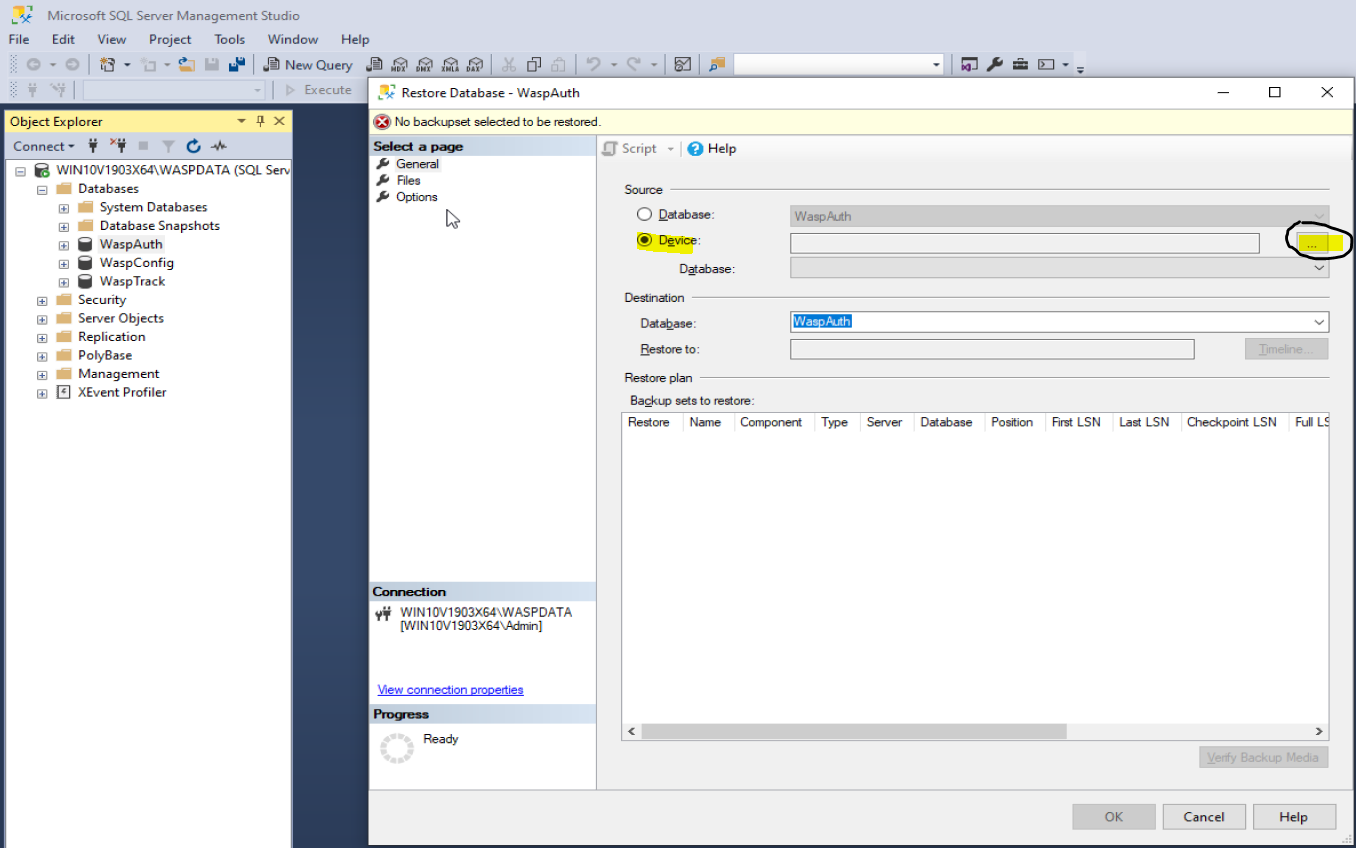
- Expand Databases on the left and right click on WaspAuth > go to Tasks > Restore > Database..
- Select the 'From device' option and click on the browse (...) button
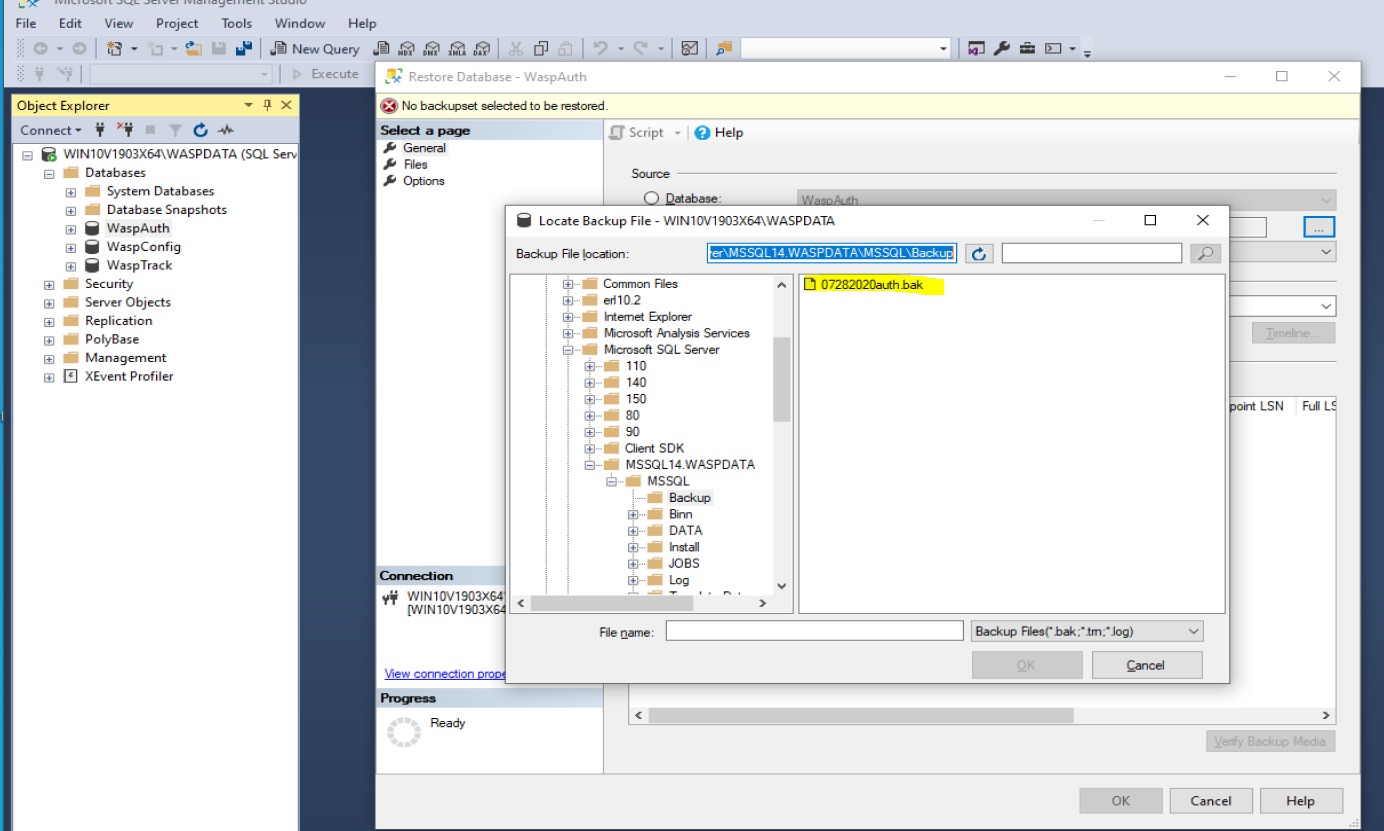
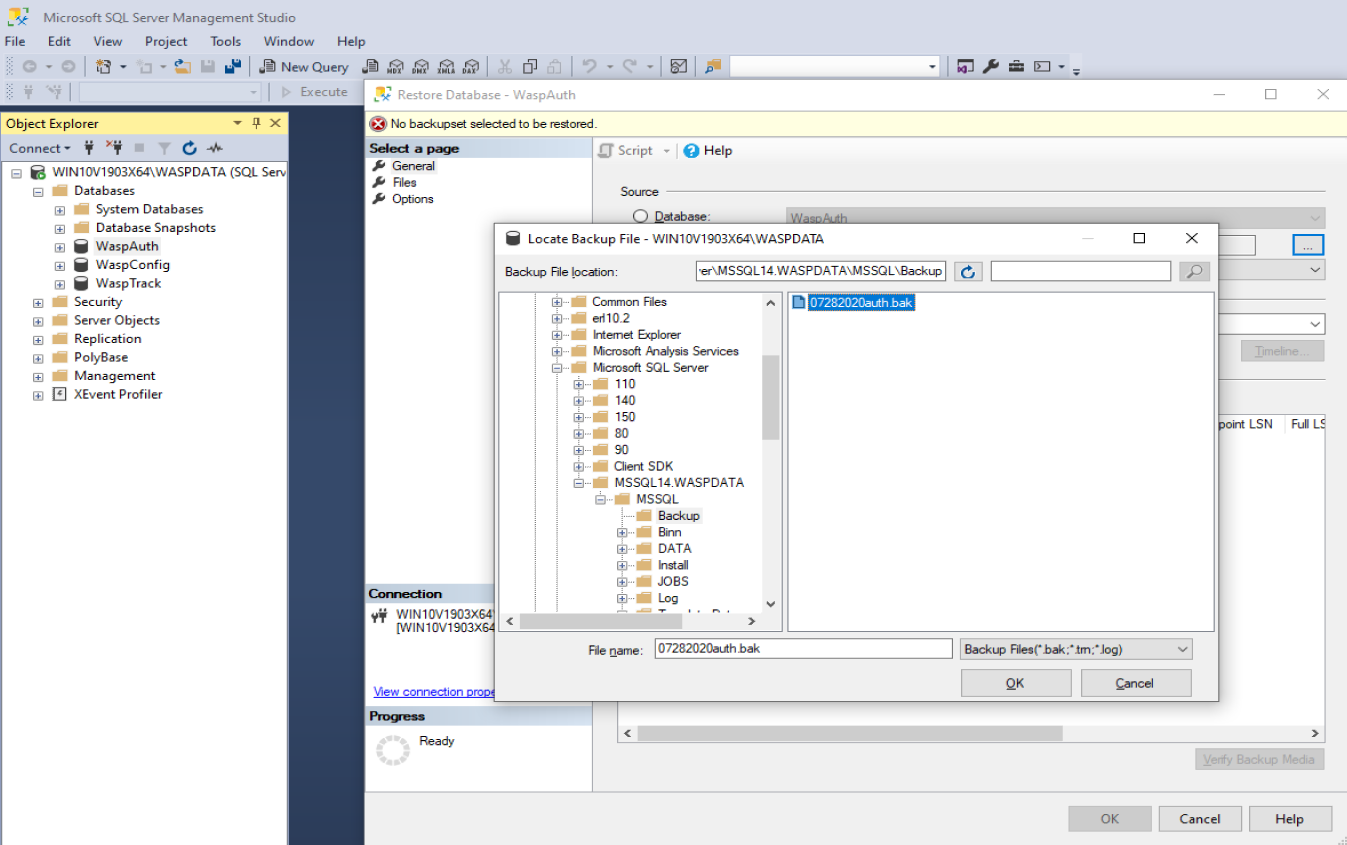
- Click on the 'Add' button

- This should open up to the correct backup folder containing your database backup and select the file > click on OK > click on OK.

- In the lower 'Select the backup sets to restore' section of the Restore Database window, check the box next to the database set displayed.
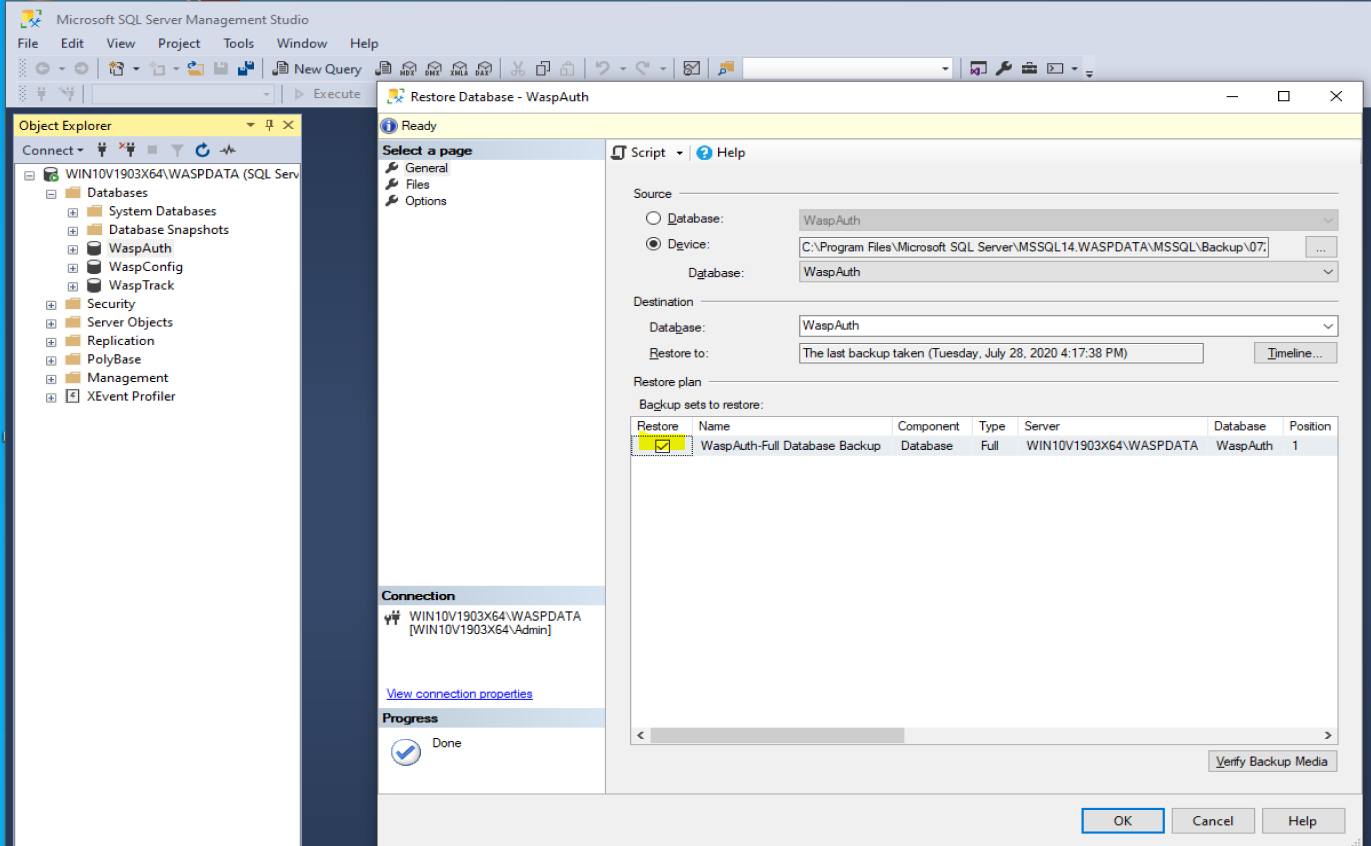
- Click on 'Options' on the left of the window and check the box that says 'Overwrite the existing database' Note: If Tail-Log backup is checked, uncheck this box
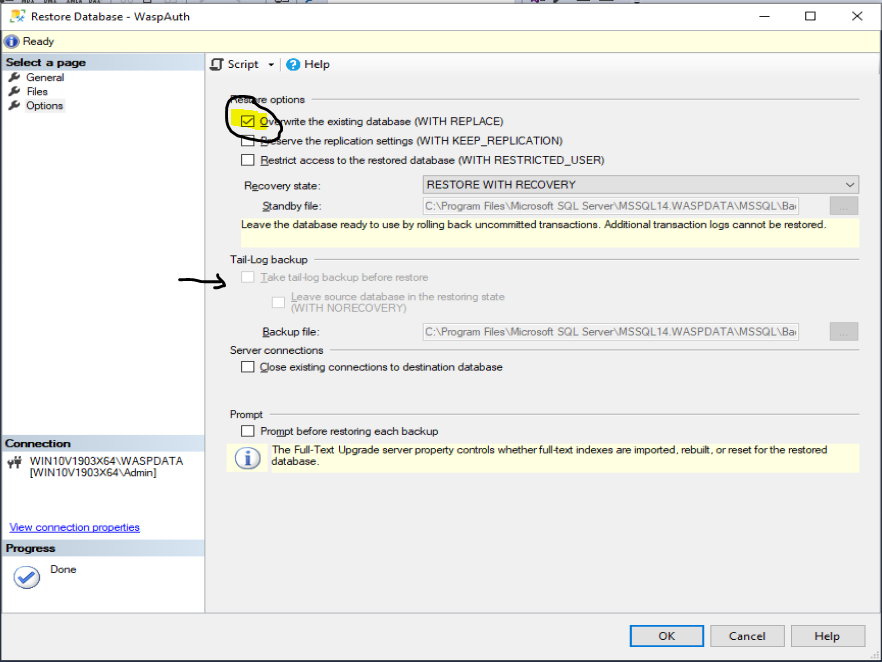
- Finally click on OK at the bottom and the backup should start restoring.
- After the progress bar on the left reaches 100% the restore should be complete.
- If your un into a "Database in Use" error message, check "Close Existing Connections to destination database" and click Ok again.
Repeat the restore steps for the WaspTrack database.
3. Fixing the Writer and Reader SQL Users using the Wasp Config Tool
- After restoring both database backups, open the Wasp Config Tool as Admin and Validate SQL and update the Reader and Writer passwords.
- If you do not have the shortcut on your desktop for the Wasp Config Tool, it should be located here:
C:\Program Files\Wasp Barcode Technologies\Wasp On-Premises Software\License\configure\Wasp.Installer.Configure.exe 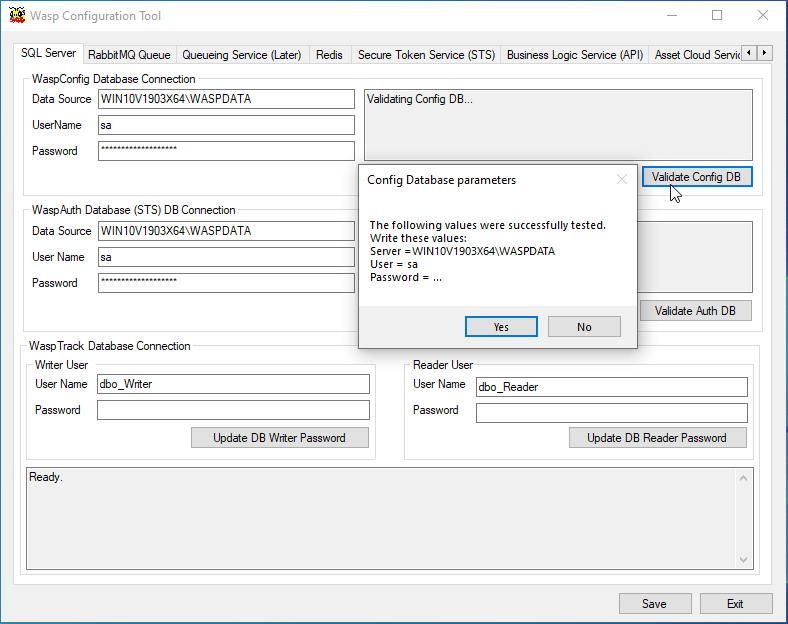
- Click "Validate Config DB", then in the popup select "Yes"
- Then use the following to update the writer and reader user passwords
dbo_Writer db0-Wr1ter_P455w0rd
dbo_Reader db0_Re4der-P455w0rd - When you update the passwords, it may give you an error message and ask if you would like to fix it, say "Yes":
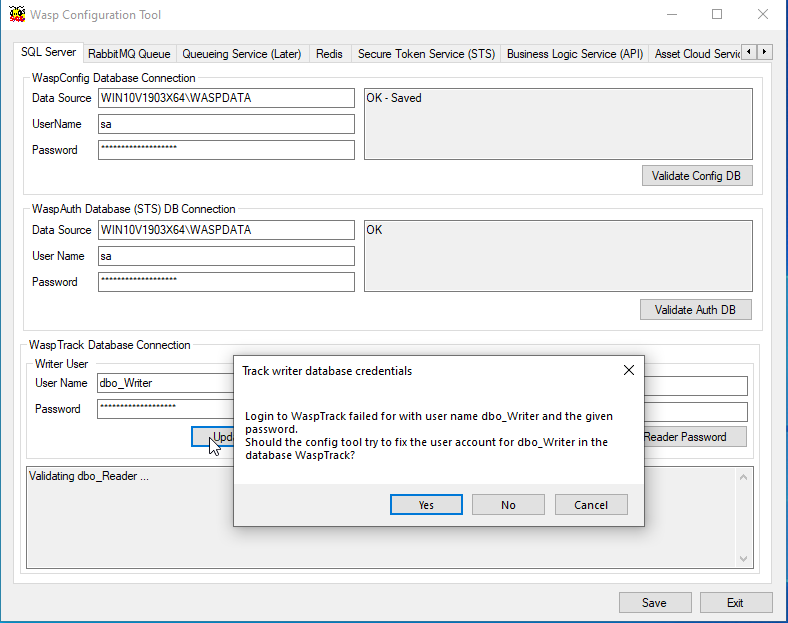
- Keep pressing "Yes" to fix until the results read "updated successfully"
- Do this for both the reader and the writer. It may be possible that you will see an error message here as many as 4 times. If you get this error more than 5 times, there may be some other issue that requires troubleshooting.
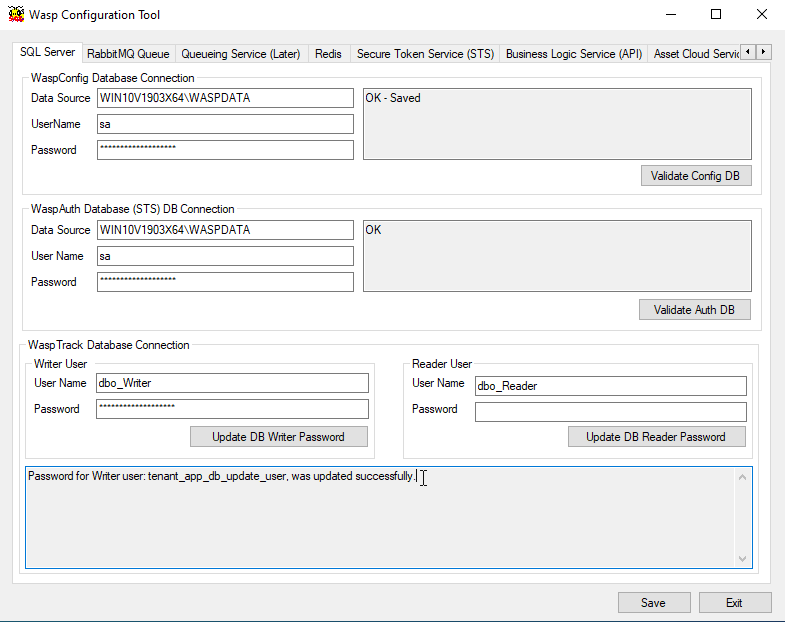
- Once both return "update successful", save and exit the Wasp Config Tool.
4. Updating the Databases
- If you're moving from an older version of the applicaiton to a newer version, you can run some commands to update the databases. If the application versions have not changed, this step can be skipped. However, there is also no harm in running this script even if the versions are the same.
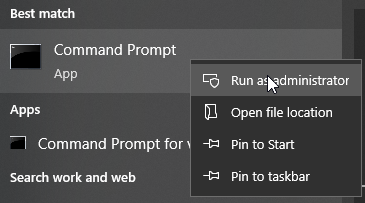
- Open CMD as Amin
- Then copy/paste the following lines one at a time:
cd C:\ProgramData\Wasp Barcode Technologies\MobileAssetWeb\Database\Tools\
Update.op.bat - This will run the code to update the databases.
- Once complete, you can close the command prompt.
5. Stop and then restart all the services (Bounce)
- Stop and then restart all the services in a specific order based on the knowledge base article below.
https://support.waspbarcode.com/kb/articles/1590
6. Attachments are not stored in the database, the knowledge base article below has the steps to move attachemnts
Once the above has been completed, you should be able to successfully navigate to your OP URL and log in.