

The software allows you to apply Daylight Savings Time to all timecards in your system.
If Time Sync Setup (see Related Articles below) is set to automatically synchronize the time clock, and synchronization was performed over the weekend, there is no need to apply daylight savings time for employees that were clocked in at the time the clock was synced.
If the following applies, use the Daylight Savings Time Screen to process daylight savings time:
- The clock was not automatically synced over the weekend
- The clock was manually updated during working hours on Monday morning after employees have already clocked in
1. Download the existing punches from the time clock
2. From the Main screen, select Tools > Process Daylight Savings Time. The Daylight Savings Time screen will appear:
3. Select the Time Zone to which you want to apply Daylight Savings Time.
4. Select whether you want to process Daylight Savings Time Start or End. The usual date for DST beginning and end will be displayed here automatically. You can change the date or time, if needed. In most cases, the time should be 2:00 AM on the Sunday when DST happens.
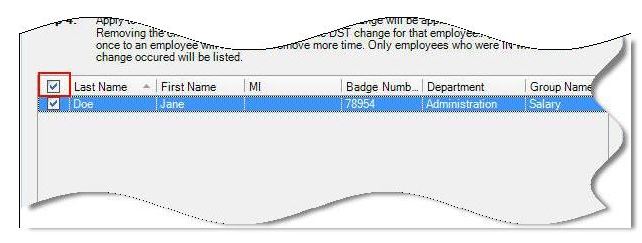
5. A list of employees will appear at the bottom of the screen. This list displays all employees in the selected time zone who show an IN punch on their timecard when the adjustment occurred. If you have created groups (ex. Salary, Hourly, Temp, etc.), you can filter this list by groups. When you click Filter Groups, the following screen appears listing all groups in your system:
Select individual employees to apply the DST changes to by clicking on the checkbox in front of his/her name, or, apply DST to all listed employees by selecting the checkbox at the top of the grid.
Note: You should only check employees who were clocked in when the DST change happened.
Note: If some employees have punched in after the clock time was updated, uncheck those employees on the list before clicking Apply Changes.
6. Click Apply Changes when you have made your selections.
====================================================
Help! I applied a DST adjustment to employees who weren't clocked in when DST happened, and now their timecards have the wrong total!
You can "undo" the DST change you applied by doing the same transaction at the same time, but with 0 in the Clock Adjustment field.
1. Select the option you originally selected, either "Process Daylight Saving Time Start" or "Process Daylight Saving Time End".
2. Date: The date you originally specified.
3. Time: The time you originally specified.
4. Clock Adjustment: 0
5. Make sure all affected employees are checked (the employees with wrong timecards).
6. Click Apply Changes button. (If this button is grayed out, uncheck an employee, then recheck. The button should be active now.)
7. Confirm the time totals are correct on timecards on the week DST happened. You can also click the Adjustments button and check the DST date to confirm the DST adjustment is no longer listed.