How To Update JQuery to 3.5.x
This article can also be used to remove Erlang and RabbitMQ completely (which are no longer needed by Wasp's Cloud On-Premise software), which also removes Jquery. For this purpose, you can skip to the Procedure heading below.
At the time this guide was written, external scans of Wasp AC and IC claim they use JQuery 1.2. This poses a problem for some customers, who demand a newer version.
In our case, RabbitMQ is easily locked down so no security vulnerability is exposed, but some customers find it preferable to upgrade RabbitMQ rather than explain the presence of an obsolete JQuery.
One does not upgrade JQuery like one upgrades an application. Instead, one has to upgrade the software that uses JQuery. In the case of AC and IC, this is RabbitMQ. Since RabbitMQ is tightly bound to Erlang, we cannot upgrade RabbitMQ without upgrading Erlang.
Neither of these packages make upgrading easy. But it can be done.
Note: This document refers to the program files folder C:\Program Files. The actual drive and folder may be different. A safe approach is to use the Windows command-line variable %ProgramFiles%.
If your %ProgramFiles% are on some alternate drive, such as drive X:, then it would resolve to X:\Program Files rather than C:\Program Files.
Prerequisites
Prepare for this procedure by organizing the pieces you will need.
RabbitMQ
Before beginning, obtain an installer for RabbitMQ that will use a new enough JQuery, version 3.8 or newer. The example here calls out RabbitMQ 3.9.5. The installer is rabbitmq-server-3.9.5.exe.
Every version of RabbitMQ has a specific range of Erlang versions that may be used. Which brings us to:
The website pages for RabbitMQ shift frequently, so you will likely have to search for the correct download and compatibility pages. Here is what worked when this document was written:
- RabbitMQ Erlang Version Requirements — RabbitMQ (https://www.rabbitmq.com/which-erlang.html)
- Installing on Windows — RabbitMQ (https://www.rabbitmq.com/install-windows.html)
- https://github.com/rabbitmq/rabbitmq-server/releases
Erlang
This example uses Erlang 24, which the RabbitMQ website says is appropriate for RabbitMQ 3.9.5. The installer for this is otp_win64_24.0.exe.
Website pages change frequently, so you will likely have to search for the appropriate Erlang. At the time of writing, the site was
- Erlang Programming Language (https://www.erlang.org/downloads)
RabbitMQ Configuration JSON
Prepare a JSON file that will later be used to configure RabbitMQ. The easiest and safest way to do this is to export the existing configuration.
Export Existing RabbitMQ Configuration
Open a browser such as Edge (do not use IE).
- Navigate to http://127.0.0.1:15672/#/
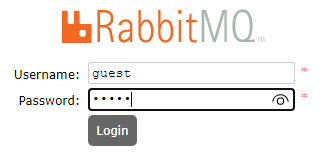
- Log in to the RabbitMQ Console. In this example, the guest account was left active.
- Scroll down the Overview tab

- Expand the Export definitions section

- Click “Download broker definitions” and save the file.
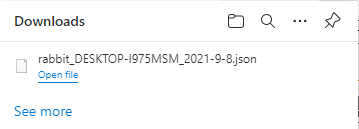
If your browser is not set up to let you pick the name and location, you may find it useful to move it to a better location with a better name.
System
Make sure the OS is completely updated. Check for Windows updates multiple times. Reboot until no pending restarts remain. This will often require more than cycle of checking for updates, applying them, rebooting, and checking again.
Procedure
Stop the Websites
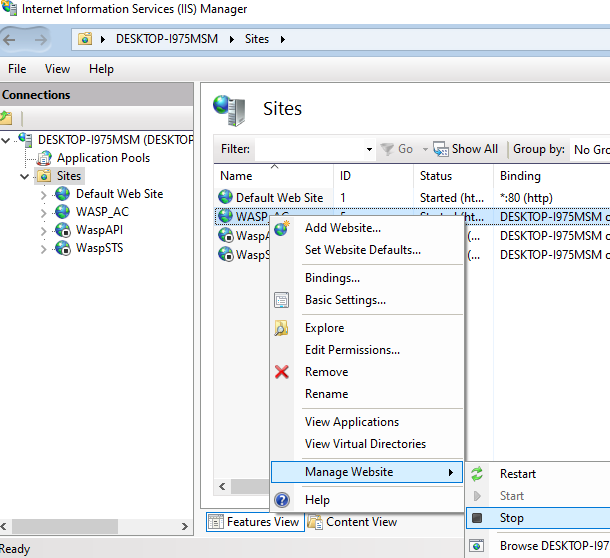
- In IIS, stop the Wasp websites (STS, API and WASP_AC or WASP_IC). Note that old versions will have an MVC site instead of WASP_AC or WASP_IC.
Stop the Services
- In Services.msc, set the "Recovery" properties of both Wasp Now and Wasp Later services to "take no action". This makes stopping the services easier.
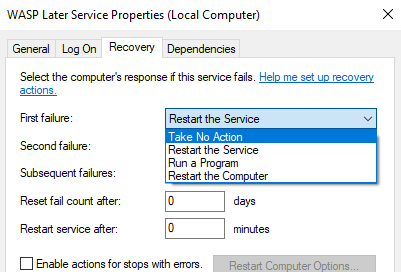
- Check the “Recovery” settings for the RabbitMQ service. Set them to “take no action” if necessary.
- Stop the Wasp Later service, then the Wasp Now service.
- Stop the RabbitMQ service.
Uninstall Erlang and RabbitMQ
Note that this must be done from the same user account that was used when the Wasp Barcode AC or IC software was installed.
Deactivate the RabbitMQ Service
- Open a command prompt in Administrator mode.
- Enter: pushd %RABBITMQ_SERVER%
If your Wasp installation was set up correctly, you are now in something like:
C:\Program Files\RabbitMQ\rabbitmq_server-3.7.17
- Enter: pushd sbin
- Enter: rabbitmq-service.bat remove
- Check in Services.msc to see that the RabbitMQ service is gone. You may have to refresh.
- If the service is still there and has a “disabled” status, you will need to reboot the computer before proceeding.
Leave the command prompt around. You’ll need it later.
Uninstall Erlang
- In the Appwiz.cpl, uninstall Erlang OTP 21 (10.x).
- When done with the uninstall, open the task manager, switch to the Details tab, sort by Name, and then look for epmd.exe.
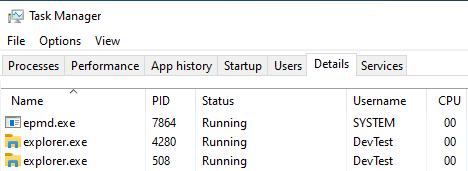
Deactivating RabbitMQ and uninstalling Erlang should have stopped this exe, but it doesn’t.
- Right click epmd.exe and bring up its properties. This will provide the location you will need next.

- In the administrator command prompt, navigate to the location indicated.
pushd "C:\Program Files\erl10.2\erts-10.2\bin"
- Enter: epmd.exe -kill
- In the task manager, check that epmd.exe is no longer present.
- Navigate back up to “Program Files” so the command prompt isn’t locking the folder.
Delete .erlang.cookie Files
- Find the old .erlang.cookie files and delete them.
Look in both %userprofile% and Windows\System32\config\systemprofile\ for copies of the file. Note that modern Windows may try to prevent you from accessing the system profile directory directly. You may have to drill down, one folder at a time, granting permission to access to each one.
If you are removing Erlang and RabbitMQ in order to remove Jquery, stop here.
Install New Erlang
- Rename the existing Erlang folder (%ProgramFiles%\erl10.2) to erl10.2.deprecated. Or just delete it.
- Install Erlang. In this example, otp_win64_24.0.exe. See Prerequisite section.
- In this example, we will install to the default location of %ProgramFiles%\erl-24.0.
- You may choose the option “Do not create shortcuts”.
Install the New RabbitMQ
- Rename the existing old RabbitMQ folder (%ProgramFiles%\RabbitMQ) to RabbitMQ.deprecated.
- Install the new RabbitMQ. In this example the installer is rabbitmq-server-3.9.5.exe. See Prerequisite section.
- Make sure the “RabbitMQ Service” component is checked.
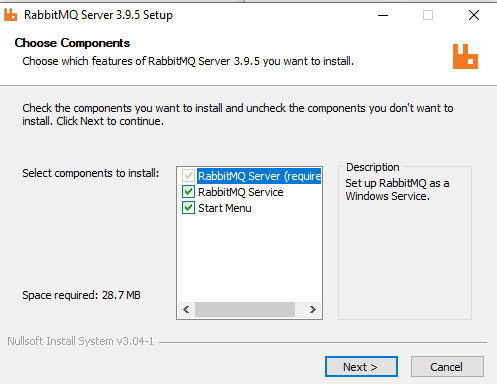
- Install to the folder %ProgramFiles%\RabbitMQ. You should choose the folder name that was originally used by the old RabbitMQ. While you may install to a different folder, configuring that folder for use with Wasp AC or IC is beyond the scope of this document.

- Installation of RabbitMQ will trigger two Windows Security Alerts. Allow Access on both.
Configure RabbitMQ
Environment Variables
Use your favorite method to set environment variables. Some use Setx in an administrator command prompt, others bring up the old System Properties dialog and go to Environment Variables.
- If the prior steps went correctly, ERLANG_HOME is already set correctly. If not, execute these commands from the administrator command line (cmd.exe):
- Determine the MSDOS 8.3 short file name for the Program Files direcotry
dir /s "%ProgramFiles%\.."

“PROGRA~1” is the short name we want. Ignore the one for “Program Files (x86)”.
Note: Pay close attention to the digit in the string PROGRA~1 and the drive letter. It is not always #1 and not all machines use drive C:
Note: Examples use "setx /M", but you may use the environment variable popup instead.
- Use the 8.3 short file name for “Program Files” to set the ERLANG_HOME environment variable.
setx /M ERLANG_HOME "C:\PROGRA~1\erl-24.0" - Set the RABBITMQ_SERVER environment variable.
setx /M RABBITMQ_SERVER "%ProgramFiles%\RabbitMQ\rabbitmq_server-3.9.5" - Set tje RABBITMQ_BASE environment variable.
setx /M RABBITMQ_BASE "%ProgramFiles%\RabbitMQ\rabbitmq_server-3.9.5" - At this point close any command prompts to make sure the variables are set.
Note: You can get to the old Environment Variables popup by going to the windows taskbar and running “env”, then edit [Environment Variables] instead of using “setx /M” from the command line
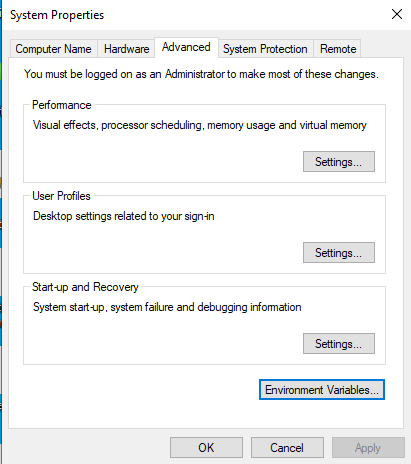
RabbitMQ Setup
- Open a command prompt in administrator mode.
- Enter: pushd "%ProgramFiles%\RabbitMQ\rabbitmq_server-3.9.5\sbin"
- Enter: rabbitmq-service.bat install
- When that completes, open Services.msc, refresh, find RabbitMQ and check the properties. Path to executable should be "C:\Program Files\erl-24.0\erts-12.0\bin\erlsrv.exe"
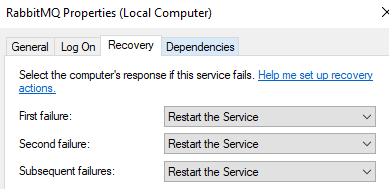
- Change to the Recovery tab and set all three restart actions to “Restart the Service”
- Set the restart time to 0.
Back in the administrator command prompt,
- Run: rabbitmq-plugins.bat enable rabbitmq_management
- Run: rabbitmq-plugins.bat list
Start the RabbitMQ Service
- Run: rabbitmq-service start
- Refresh the Services.msc UI
- Check that RabbitMQ is now running
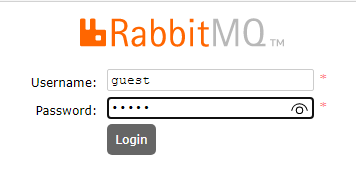
Log in as Guest
Do not use Internet Explorer for the following steps. You may use Edge, Firefox, Chrome or other favorite browser.
- Navigate to http://127.0.0.1:15672/#/
- Log in as guest with password guest
Check the .erlang.cookie Files
- In file explorer, navigate to %windir%, then to the subfolder System32\config\systemprofile
- Find the .erlang.cookie file. Note the time stamp and the size. It should be today’s date.
- Open another file explorer and navigate to %UserProfile%
- If everything went OK, there will be a matching .erlang.cookie file. If there is a discrepancy, copy the file from SystemProfile to the user profile area.
Import the JSON Configuration File
Note that RabbitMQ may have found and preserved your prior configuration, making this step harmless but unnecessary.
- Back in the browser logged into the RabbitMQ console, scroll down the Overview tab.
- Expand “Import definitions”
- Choose the JSON file you prepared as a prerequisite

- Upload the definitions
Check the Exchanges
You should find the exchanges now include:
- dead_letter_exchange
- mobile_data_exchange
- scheduled_job_later_exchange
- scheduled_job_now_exchange

Check the Queues
You should find the queues now include:
- dead_letter_queue
- mobile_data_queue
- scheduled_job_later_queue
- scheduled_job_now_queue

Check the Admin
Users should now include:
- mobile_processor
- mobile_runner
- scheduled_job_requester
- scheduled_job_runner
- scheduled_job_scheduler

Start the Wasp Services
In the Services.msc:
- Start the Wasp Now service.
- Start the Wasp Later service.
- Reset the now and later service recovery options to "Restart the Service" with a 0 (zero) minute delay. This should be done for 1st, 2nd and 3rd failures.
Start the Web Services
In IIS:
- Start the Wasp STS, API and Wasp_AC or IC websites.
- Browse to the sites and verify that they are up.
Check the JQuery Version
The exact procedure for checking the JQuery version will depend on the browser you are using.
- Log in to AC.
- Activate the developer tools. In the Microsoft Edge browser this is F12.
For Chrome or Mozilla Firefox, this is Control+Shift+I - Go to the "Console" tab.
Enter: $().jquery
If $().jquery does not work, try: console.log(jQuery().jquery);
- The version should be 3.5.x.

This concludes the manual update of RabbitMQ.

