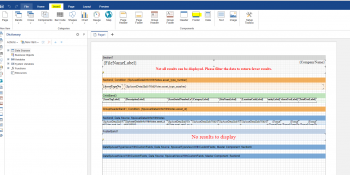
Product: AssetCloud
Report: Asset by Asset Type Report
Desired customization: Add Grand Total of all assets, both fixed and multi-quantity
1. Go to Reports > All Reports > Asset Reports > Asset by Asset Type, and click the Design Report button.
2. When the report designer opens up, go to the Insert Tab and drag a Footer down below Footer 1.
3. Drag a Text Box down into the new Footer, enter your label (for example, Total Number of Assets), then click OK.
Note: You can click on the box and make it bigger by dragging the handles.
4. At the bottom left, click Properties. Expand Functions, Totals, Math, Sum. Click and drag "SumD (object) double" next to your total label.
5. Double-click on the object, then click on Summary. In the Summary Function drop down scroll down and choose SumD.
6. In the Data Band field, click the dropdown and choose Section8.
7. Click on the pencil next to Data Column.
8. Expand SpAssetDetailInfoWithNotes, scroll down and click "asset_inv_quantity". Click OK.
9. Go to the Preview Tab, and wait until it fully loads. Click on File menu, Save As and give it a slightly different name (for example, Asset By Asset Type Report w/qty).
Note: Do not close the report designer, in case further changes are necessary.
10. Go back to the Reports list and refresh the browser (F5 key). You should now see your new report name in the list.
11. Test the appearance of the changes by running the report.
12. If changes are needed, go back to the report designer and make them, then File menu, Save. Go back to Step 11.
13. When the report is satisfactory, close the report designer.


