

- Transaction history, purchase orders and pick orders cannot be exported from InventoryControl or imported into InventoryCloud.
- In order for the export scripts to work properly you need to use SQL Server Management Studio 2016 or newer
*Note: This is not merely a recommendation.
The export will not work properly in earlier versions of SSMS
(not even the version of SSMS installed with InventoryControl v7 by default). - SQL Server Management Studio 2018 can be downloaded here https://docs.microsoft.com/en-us/sql/ssms/download-sql-server-management-studio-ssms?view=sql-server-ver15
- Download the scripts and extract them to a folder
- Login to SQL Server Management Studio using sa and Wasp$07Wasp$07 for user name and password (Enterprise users with your own SQL Server may be different)
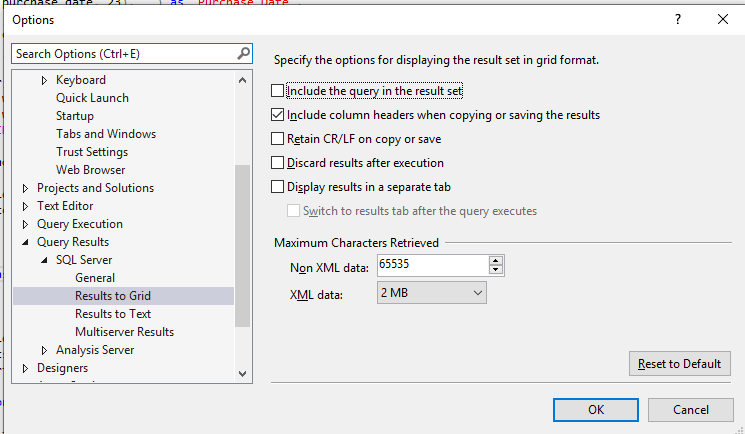
- In SQL Server Management System go to Tools > Options > Query Results > SQL Server > Results to Grid and ensure that "Include column headers when copying or saving the results" is checked.
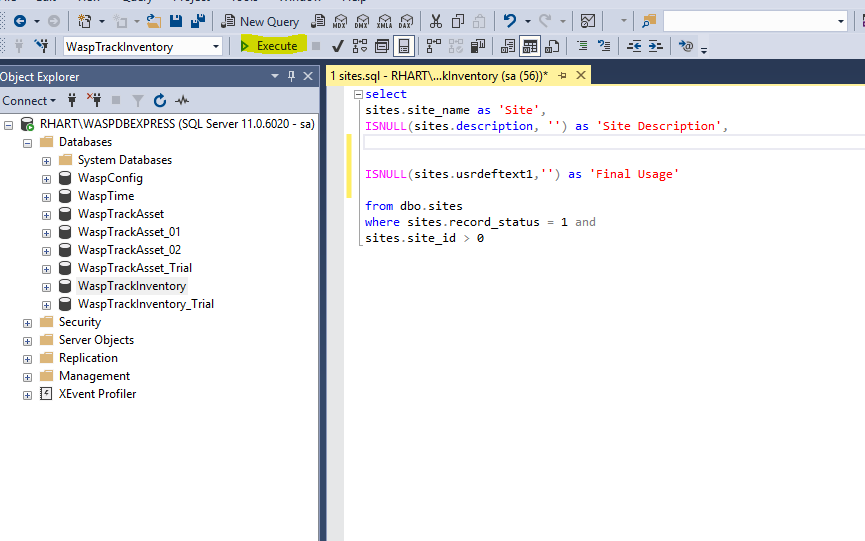
- In SQL Server Management Studio, make sure that WaspTrackInventory is selected, then click on File > Open File. Choose the appropriate SQL Script.
- Click on Execute
- Once it has executed successfully right click in an empty space and choose Save Results As
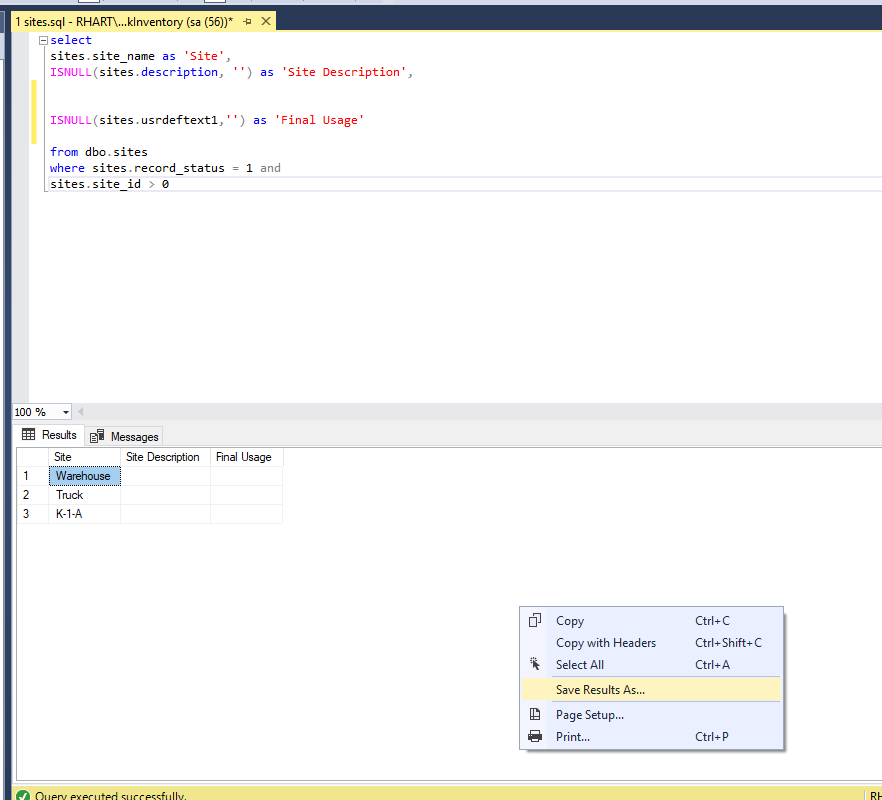 Give the file a name associated with the number and name of the sql file that produced it.
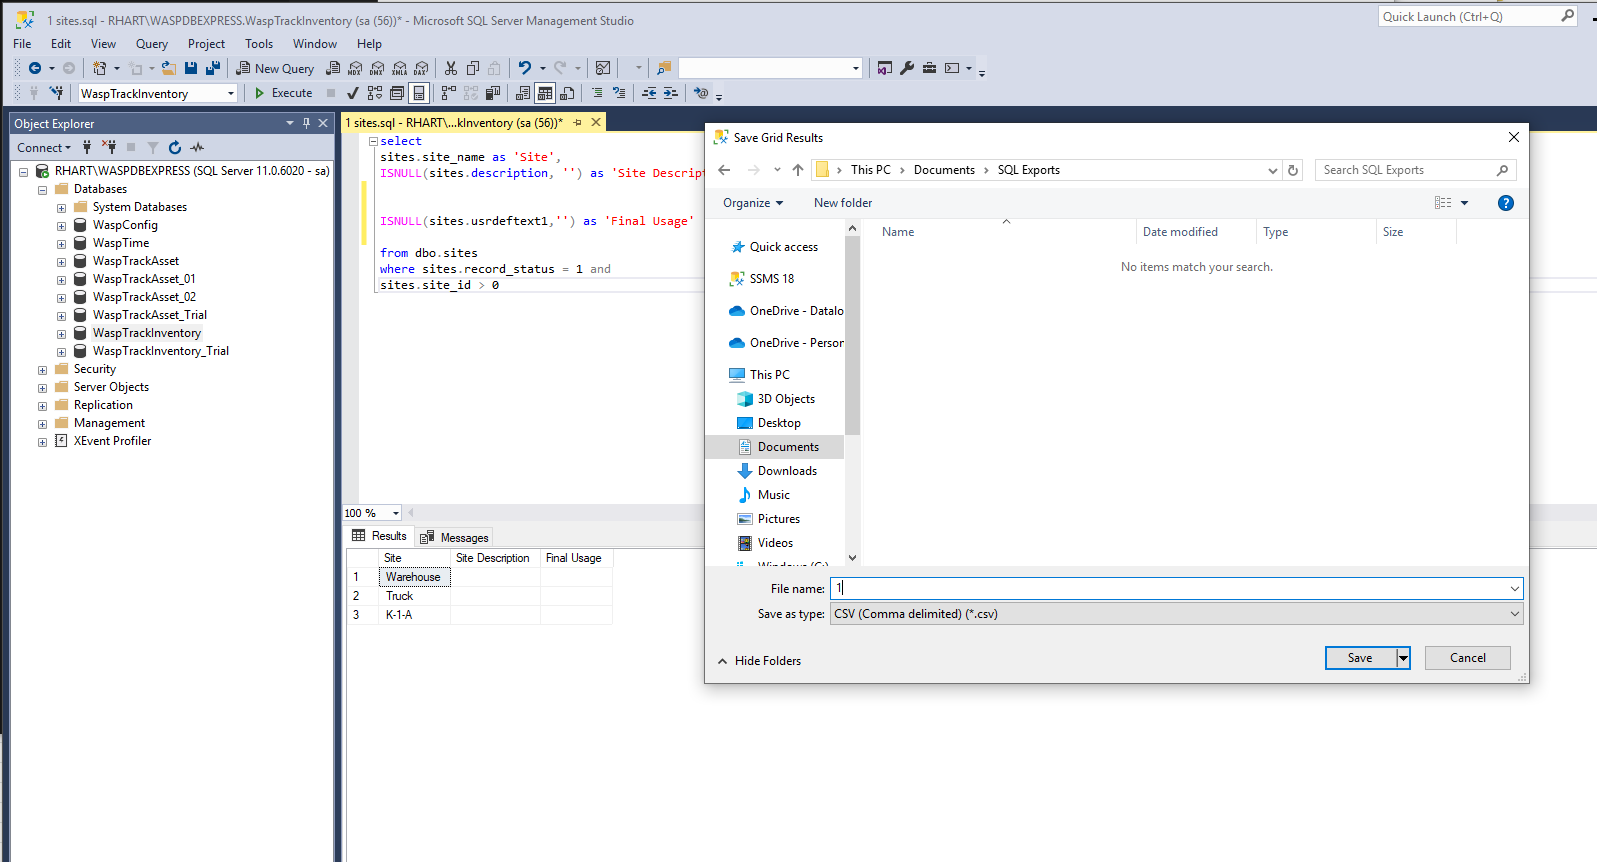
- Export your data using all number scripts. If there are no results you do not need to save the file.
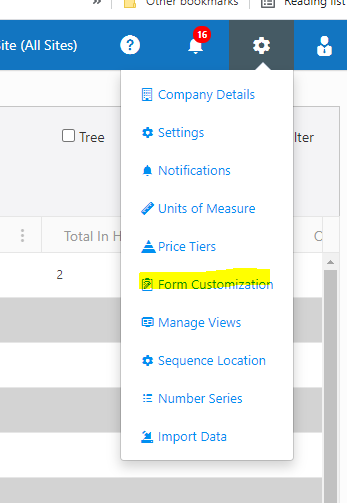
- Once all files have been saved, open InventoryCloud. Click on the gear icon and choose Form Customization
- Open the file created by 00_CustomeFields.sql and create a custom field for each row.
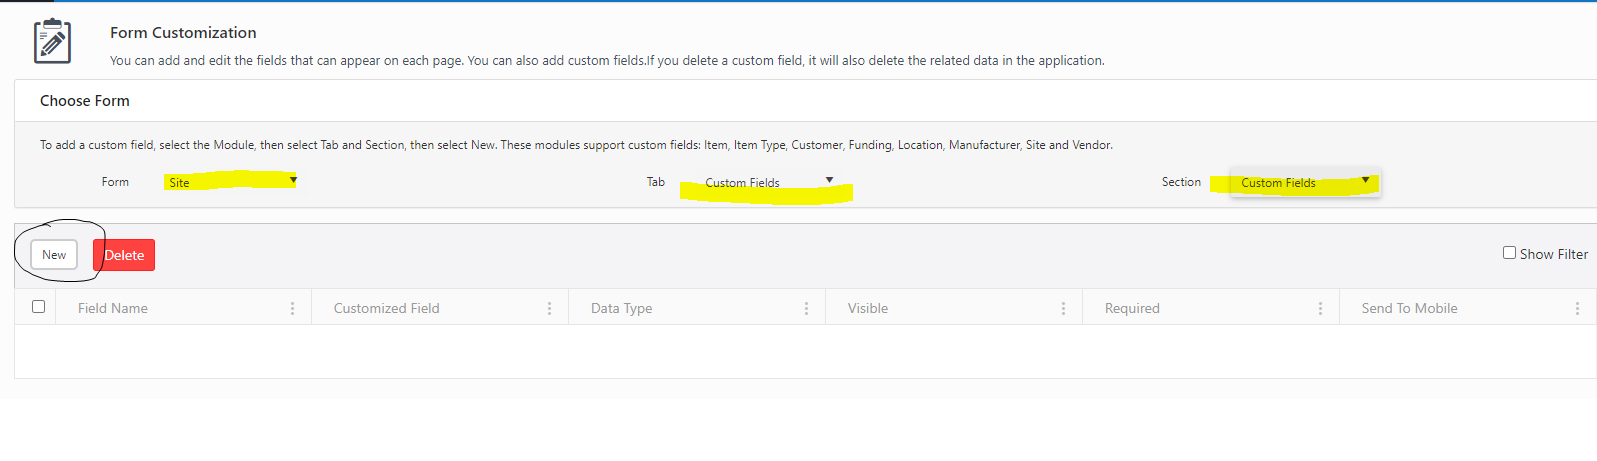 Click on New, choose the data type and type your field name and click Visible
 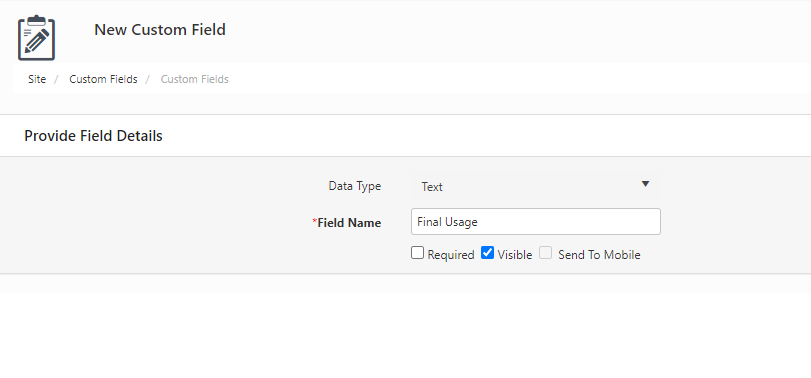 Then click Save at the bottom of the screen
 - After creating all of your custom fields you should be able to import your data using the files you saved from the database, in the order listed.
****Note: Be advised that users with the basic edition of the software may not have the ability to import sites, this will cause all subsequent form numbers to be off by one.
If you have images or attachments in InventoryControl, you can use the article below to import them into your InventoryCloud